Saturday, 12 October 2013

Handwriting fun

I wanted to share with you today a few handwriting techniques that are fabulous for label writing. They are great for jam jars, gift tags or for sentiments on handmade cards.

 
So first things first, choose a fine line pen or a gel pen that has free flowing ink. This technique does not work so well with a biro. My favourite pens are Papermate Tikky graphic by Rotring. Bloke bought them for me one Christmas and I haven't gone back.
 

First of all write your message in your normal handwriting. You may find that some letters you join and others you don't. The key to a great handwritten font is consistency so if you do a different 'a' or 'e' you need to stick to that style.


Next try that phrase by not joining at all and concentrating on even spaces between letters but keep it pacey to gain flow.

 
Now using the phrase add a dot to the ends of the letters. Instant card message font.
 
The next one follows the same principles.
 
 
Write the phrase with spaces between the letters then...

 
Add a little line dash to the ends. This can be varied and you can have all your dashes flowing in the same direction or they can always come from the left or right of the letter or right across the ends as in the 'H' shown. Again choose one style and stick to it for the entire phrase.
 
Another thing you can do to vary your font is to experiment with working below the written baseline like this...
 
 
Note that H goes below the line,  and I and A are in the air, the P's are different lengths. To tidy this up...
 
 
Add the dots - it looks informal and fun and the inconsistency of not writing on a straight line doesn't show up.
 
You can use these in lots of different ways.


So what are you waiting for? Grab a pen and a piece of paper and get squiggling. Jo x


Friday, 11 October 2013

Cosy tosies

I have been busy with work this week but I have been adding stripes every evening to this little pressie for the Christmas box.

 
No pattern just my usual crochet along with wool people have given me. The wool is leftover from my hexagon blanket (which Little M watches Strictly come dancing under on Saturday nights)
 
 
A chain stitch tie.
 
 
A flower I made at this weeks crochet lessons from the tutorial on the right. I end up with lots of these little samples because as I show people, I always end up with one of my own at the end.
 
 
It is a rectangle shaped bag, no shaping, in rows of trebles with a tiny scallop down the edges to tidy it up.
 
Perfect for these north winds. Thanks for checking in. Jo x


Thursday, 10 October 2013

Relaxing project

It is time to relax, most of my small project WIPS were finished and now I need a little interim project to sink into. Roll up Attic24 for your fantastic snowflake tutorial.

 
I just sat quietly in the evening and made 7 little snowflakes out of Patons 4ply cream cotton on a 2.5 mm hook

 
 So relaxing and easy to make using chain and double crochet.

 
They are strung up in my office until it is time to hang them in the front sash window when real winter comes along, which judging by the north winds today, not long. Thank you so much for stopping by. Jo x


Tuesday, 8 October 2013

Hooray! stitchalong bag

My bag is finished and I am really pleased I joined in with Chrissie on the Stitchalong because I would never have made this bag without aiming for a little bit to be done every Sunday. I saw it when I was given the book 'Patch' by Cath Kidston for my birthday but I thought it would always be on my wish list.

 
As ever there are a few modifications. The main one being the feather stitch which I could do eventually but not evenly enough to frame each square, I sewed up the tab end to the long one on the strap for strength rather than relying on just the button, I added an inside pocket and finally, a magnet fastener.

Ooops! a bit of black tacking there!


It is a pretty huge bag which would fit an A4 folder in easily so I think I will use it for my maths tutoring work. After having to buy bias binding to finish my dinner mats, I used the remainder for the straps but otherwise I did not spend any money to complete the project.

I have enjoyed looking at all the stitchery from everyone who has joined in and I will continue to tune in. Thanks for motivating me to do a project I never thought I would complete.

Now, it is far too lovely outside to be making a bag inside so Little M and I are off to the park for a play in the autumn sunshine.

Lots of love Jo xxxx

Monday, 7 October 2013

Stitchalong part 4

I have made four of my chicken squares. I am not sure they are all facing the right way but that is small fry compared to the overall look. I spent last night cutting and measuring the pieces to construct the bag.

 
I found the last little bit of my Provence Rose Cath Kidston fabric from my kitchen curtains. The cord dress and the ditsy flower print are salvaged from girls dresses and the gingham is some remnants from an old patchwork duvet cover I made years ago.

 
Actually, they were all the bits of fabric I rummaged out to make the girl's dinner mats. I have made two more this week so I have two to have out and two to wash. Shock, horror, but I did have to go out and BUY bias binding to finish these off which is why they are a later addition.

 
Sewing machine hour here I come, Loving all your stitching projects... Jo x

Saturday, 5 October 2013

In my other basket...

In the background of all this preserving, cooking and thrifting, I am slowly making a bit of progress on a big winter knit. I originally posted it here. A sort of collage of a jumper using different yarns and patterns. Right up my street for a bit of free yarn stash busting.


The double moss stitch is really effective and was a breeze but now I am on the lacy part which also requires me to change colour, I won't lie, I have had to unpick a few rows but I think the pattern has sunk in now.


It is just simmering away in the basket for when I want some knitting action without the TV on, usually at about 2.30 in the afternoon when I try and stop and sit for 30 minutes with my own thoughts before I do the school run. Today I took it to the girl's ballet lessons (everyone is used to me making something while watching!)


What will it look like?
 
 
This hopefully but with a cream bit on the bottom because although that is not what I would have chosen, I had to go with the yarn amounts I had.
 
This is what I have been making today.
What are you up to?
Jo x


Thursday, 3 October 2013

Hooray! cord skirt

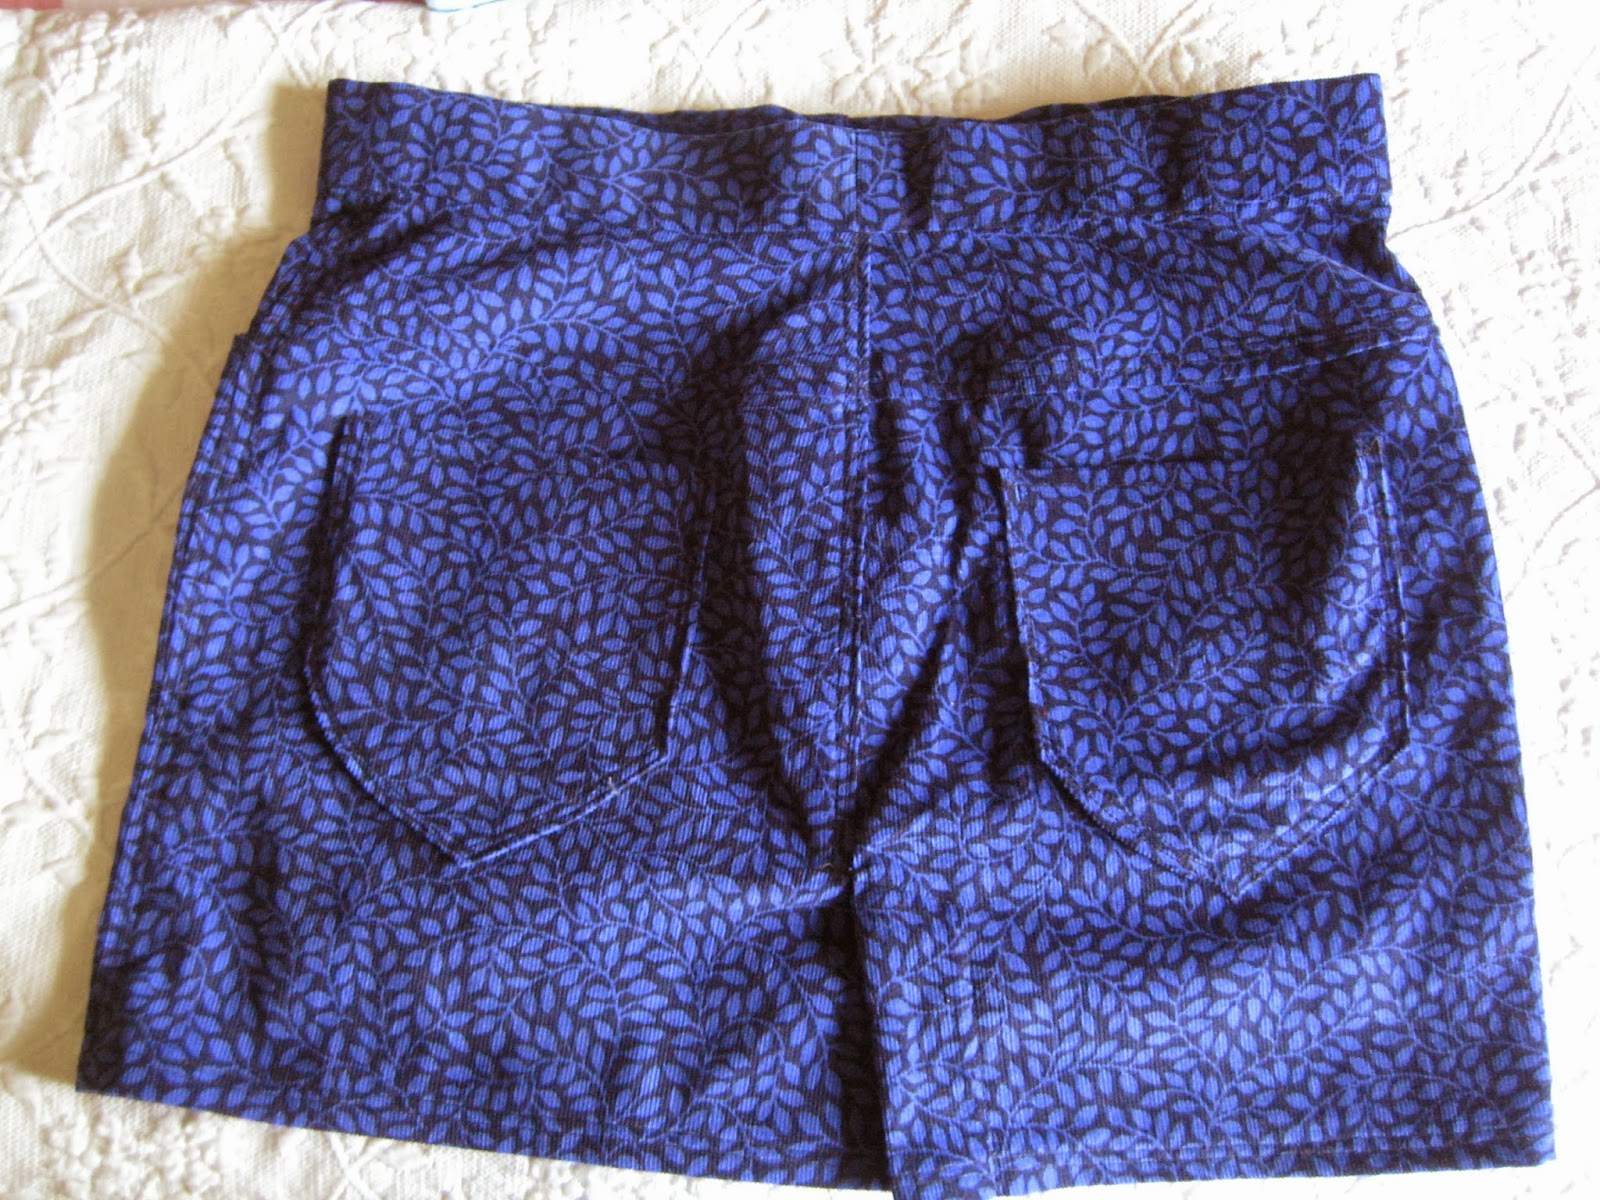
I am getting a bit obsessed with corduroy at the moment. I have worked really hard to make a skirt for Big Sis that had a few challenging techniques to up my dressmaking skills. I could have made an elasticated waist quickie skirt but I wanted to try something new.


The pattern is, as ever, from Ottobre magazine. She chose the pattern and I thought it would be a good one to learn how to make because it is such a fashion classic.


I perfected my two rows of topstitching around the pockets and on every seam.


I put the zip in three times. Finally, I followed a tutorial here for a zip fly that made it all look so easy.


I can't get her to model it because it is way too big and I have added it to the little stash of clothes I am making for when she is older but I would definitely do another one. It won't lie flat for a photo because it has a back yoke that gives it some bum shaping and it really needs...well..to be frank..a bum in it to show how it fits.


I hope you don't tire of this £3 fabric, I still have lots left! The top is pretty funky too so I might give that a go next.


I am really enjoying sewing at the moment now that I have stopped expecting myself to complete something in one go, it is so much more rewarding and relaxing learning a new technique each time I spend an hour at the machine.

One happy lady and one happy little girl. Jo xx