Wednesday 30 March 2016

Big and Little Refashion

I bought a little bit of Liberty fabric. The pattern was from 1968, funny that because I always unknowingly choose vintage sewing patterns from 1967,1968 and 1969. Must be my thing.


Bloke had a little hole in his jumper...


I did a little bit of measuring and thinking...


I made the big brave cut...


Added little strips of Liberty ...


Next I had a little look in my sewing stash and found these vintage beauties ...


I had a little try on but it was too big...


I hammered on the little pearly poppas...


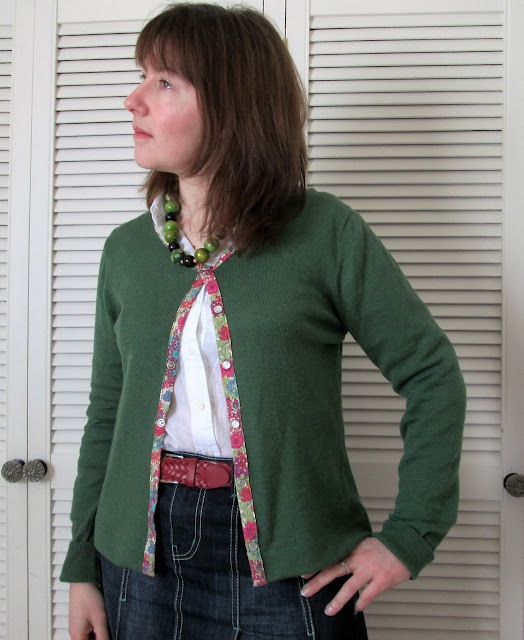
Big it up for my new little cardigan...


One less jumper in landfill.
Thanks for stopping by.
Jo xx


Monday 28 March 2016

Easter Monday

I hope you have been enjoying your long weekend here in the UK.

I made a little zip bag for a tutorial at sewing class then wondered what I was going to do with it. I decided to make up a little project kit to take to a 'waiting-around' situation that may arise at any time.


Inside it comprises a pattern leaflet, my hand painted bamboo crochet hook, the last bit of Natura Medium yarn in a shade of yellow, stitch marker and row counter.


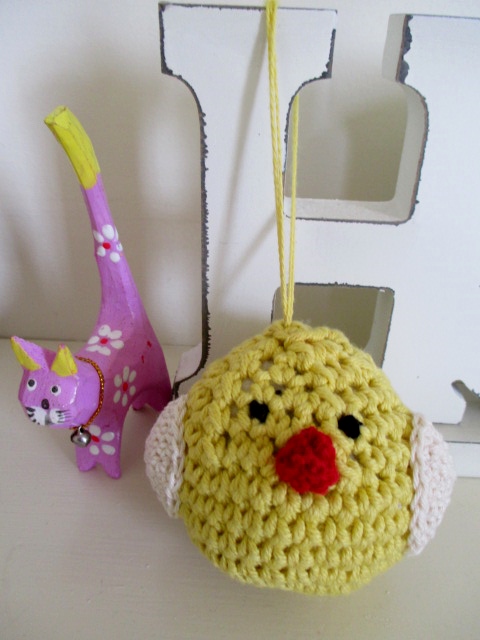
Some such situation came around and I made this little chick although her wings look a little like headphones, she has still made me smile hanging amongst the eggs on our Easter twig.


These little kit bags are perfect for taking your crafting on the go. I saw this corner technique used by Stuart Hillard in a demonstration at the CHSI show and this is how you can use it to make a zip bag:

Cut 4 pieces of fabric 20 x 24cm (2 in outer and 2 in lining if contrasting) plus 2 in wadding. You will need a 20cm zip. 


Sew the lining along two short sides and one long side. 


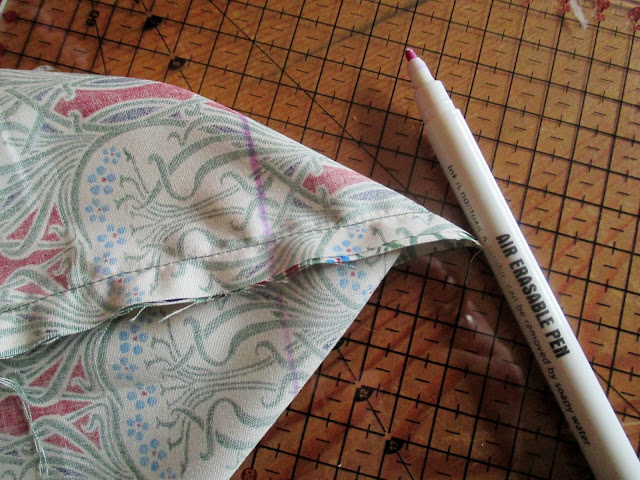
Then triangle the corners remembering to match seams.Poke your finger into the corner and flatten it out. Mark a line about 3.5cm from the point. Sew straight across and cut off the excess. Repeat for the other side. This is the lining.


Now sew the top only (zip edge)of the outer pieces using a 1.5 seam allowance on basting stitch.


Lay the zip over the seam. Right side of zip to seam opening. Pin and tack in place.


Turn fabric to the right side and sew along the seam using a zipper foot.


Now take out the hand tacking and the machine basting with an unpicker.


OPEN THE ZIP HALF WAY. Then sew the three sides of the outer bag laying a piece of wadding on each side and catching it in the seams Repeat the corner technique as described for the lining. Do not turn out.


Slip the lining over the bag wrong sides together. Turn under a seam allowance along the zip edge and hand stitch the lining to the bag being careful that stitches do not show through to the outside.


Turn the bag out because you can. You definitely had the zip half open right!?


Decorate with hand sewn applique motifs or crocheted bits and bobs.


Now fill it with all the things you need to craft on the go or make it into a gift for a friend. I gave one to my mum for mothers day with all the things she needed to make an Elise shawl on her cruising holiday. This size fits a crochet hook and one ball of yarn.

Happy Sewing and Crafting. Jo xxx


Thursday 24 March 2016

Minerva + Vintage Pledge 2016 = Butterick 3217

Let's get back to those spotty fabrics shall we...


Today I am showing you my latest make from Minerva fabric. This navy random spot was perfect for making a blouse (Butterick 3217). The drape of the lightweight crepe made it feel luxurious and didn't overpower the gathered sleeve shape. I really love it and would definitely buy it again, if I wasn't already up to my eyes in dotty fabric.


This is my new going out top. I love it. The spherical pearl buttons are so in keeping with the 1960's pattern.


I learnt new skills as ever with any garment. Today it was how to make a faced button cuff with a slit. Not hard but matching notches was the key, glad I marked them now!


The fabric is 100% polyester lightweight crepe and would make a beautiful Mathilde blouse or a pussy bow blouse, it comes in other spotty colours too.


Thanks for looking at my March Vintage Pledge sponsored by Minerva Crafts. Jo x


Monday 21 March 2016

Joni Flower Tunic

So the Joni Tunic made itself really, just like the pictures in the book. No dramas, no back story, just wonderful crochet in fabulous yarn with an easy to read pattern.


The only adjustment I made was to add a small cuff. The sleeves were a little short for me and the mesh pattern of the sleeves needed something to weigh it down to stop it looking straggly on the ends.


It is made from Katia Tupa DK 50% Merino and 50% Silk on a 3.5 mm hook. 
I used chains, dc, a kind of 4tr popcorn for the flower petals and CTR, which is a crossed treble on the yoke which is a fine stitch.


I doesn't seem to have taken very long but I was so focused on finishing a black cardigan which I hated, I kept doing a bit of this here and there to ease the boredom and here it is already finished!


The pattern is in this lovely coffee table book.
Have a great week everyone. Jo x


Thursday 17 March 2016

Frances Shirt dress

I have been musing for a shirt dress for quite a while now.


because I wanted one so much I have been a bit picky about which pattern I chose. I wanted it to be really right for my shape. I am short and I have a really short back neck to waist measurement making me short-waisted with a swayback. If I choose a shirt dress that relies on the belt for a shape, I look like I have been tied together just under by bosoms!


So it is with some trepidation that I bought this pattern as a kit with fabric included in the January Sales for £16.22 from Craftsy. The lovely model wearing it looked fabulous but she was tall with a long body. But when the pattern arrived I pondered: where would the shape come from? But you should always turn a pattern over...


Yay!It had front and back darts which I then intended to lengthen and tweek further.


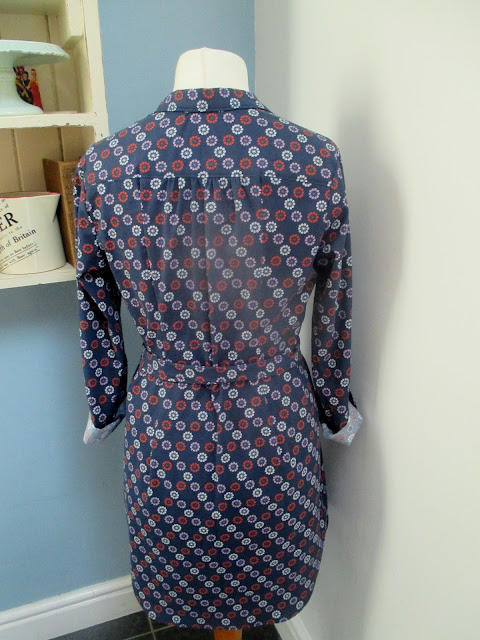
My back darts eventually went all the way up to the yoke seam and past my bottom with much more depth at the waist. This one is not pressed yet so you can see it.


My front darts went all the way up to the pocket and were also much deeper at the waist.


With these adjustments the belt tie is not rucking so much at my waist. I then decided I needed to half the width of the belt to give me a few more vital centimeteres of body length exposure. 


I made it over a whole week, doing it properly, taking my time, enjoying making this 'thing' I have wanted for so long. I even took the collar off and put it on again because it was not as flat as it could be on the underside. Oh my, I am correcting the bits people can't even see now.


I am going to wear it with leggings while the weather still chills and then it will be with bare legs in the summer.

The testing question I always ask myself after a make. 
Would I make this again? Oh yes. 
Shall I put my name label inside? yes, I am really proud of it.

Thanks for looking.