Showing posts with label stripes. Show all posts

Wednesday, 8 August 2018

More Socks

Sock knitting has been well and truly nailed this year. It took me a long time to learn the craft of sock knitting but I am now the proud owner of four good pairs and have gifted many more.


These ones were made using one ball of Wendy Roam Fusion 4ply superwash sock yarn. I don't remember where I bought it but my guess is that I went into a new yarn shop somewhere, on holiday  perhaps, and wanted to support the shop owner in their woolly venture. Since knitting socks it has been great to be able to leave a shop with one ball of wool!


This is Christina's free sock pattern. I have knit three of her patterns now and they are so easy to follow. I got into the rhythm of the rib knitting which makes for a super-snug fitting cosy sock.


There are always things to improve and my kitchener stitch is still a bit knobbly at the corners but I will get there.


I love the yarn colour changes. I have made these a bit little longer than normal because I always have quite a bit of wool left over at the end. I am still getting a feel for how long I could make the ankles, I could easily go even longer.


I enjoyed finishing these off on holiday this week. Bit hot for socks though eh?

Thanks for dropping by. Jo xx


Saturday, 13 January 2018

FREE Legwarmer Crochet Pattern

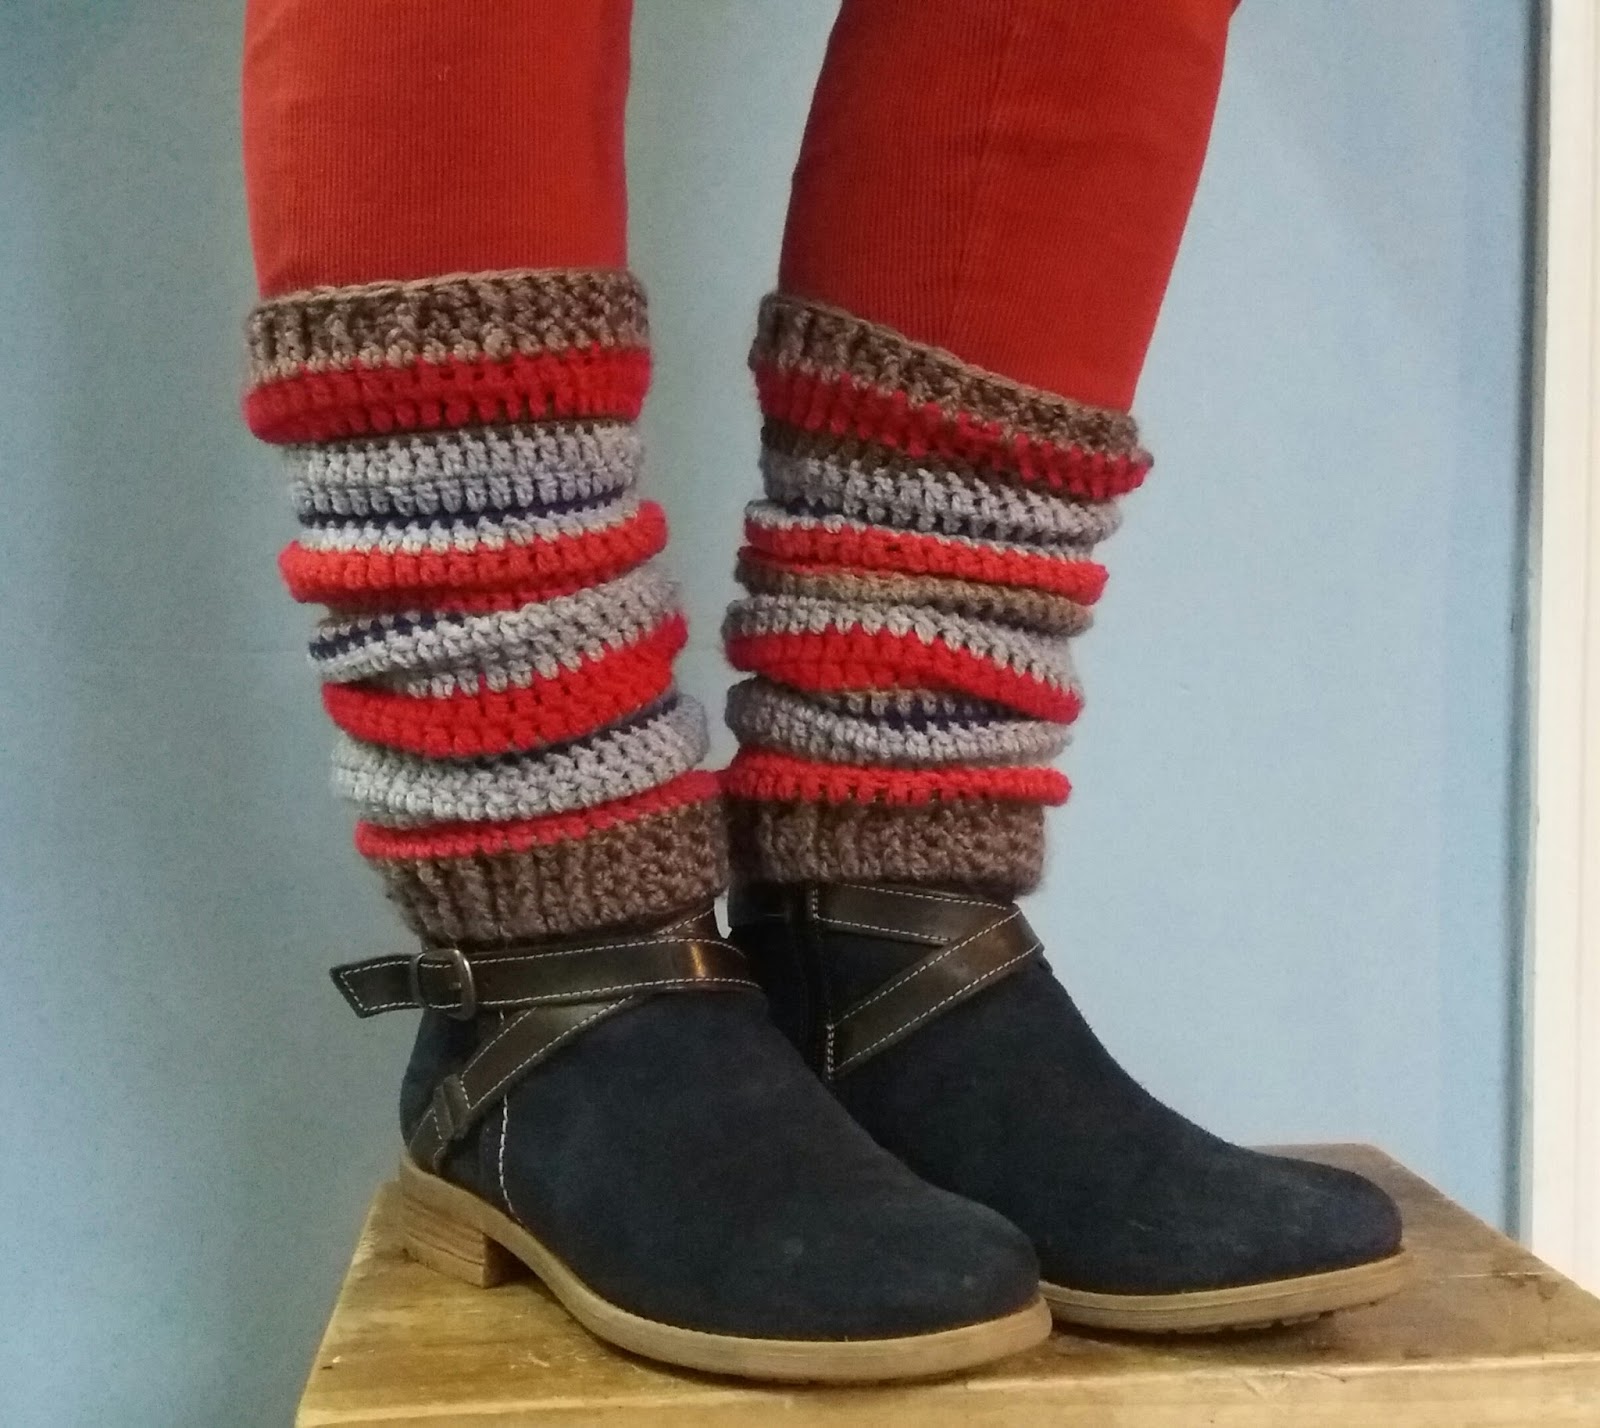
Just what the weather ordered here in the Northern Hemsiphere: stripey crocheted leg warmers.


Here is the pattern if you would like to make a pair. Make them plain or go wild and stash bust. 

4mm Hook
Aran weight yarn
UK terms

Foundation chain: 43 chains. Join with a slip stitch to make a circle. Be careful not to twist the stitches. 

Row 1: Ch3, 1tr in each chain. (43 sts)

Row 2: Ch3, 1tr behind the post of the treble from the previous row. Known as 1fbtr (front post treble video) It should raise the stitch to the front to form a rib. *1tr, 1fptr* to end. join with a ss

Row 3: Ch3, *1fptr,1tr* to end. Join with a ss

Row 4: Repeat row three. £ rows of rib complete. This is the ankle end of your leg warmer because the foundation chain makes it less stretchy than the final row.

Row 5: Change to main leg yarn or first colour. Ch3, 1tr in each stitch to end. (43 sts)

Repeat rows of trebles changing yarn for stripes or adding rows of double crochet for darker colours. When you have the desired length repeat 3 rib rows for the top of your leg warmer.

Don't forget to allow enough yarn runs for two!


Wear with long boots with them coming out of the top as boot cuffs or ruched with ankle boots.


I can't stop wearing them.


You can save the link to these on ravelry.
Happy Crochet!

Wednesday, 24 September 2014

Hooray! new PJ's

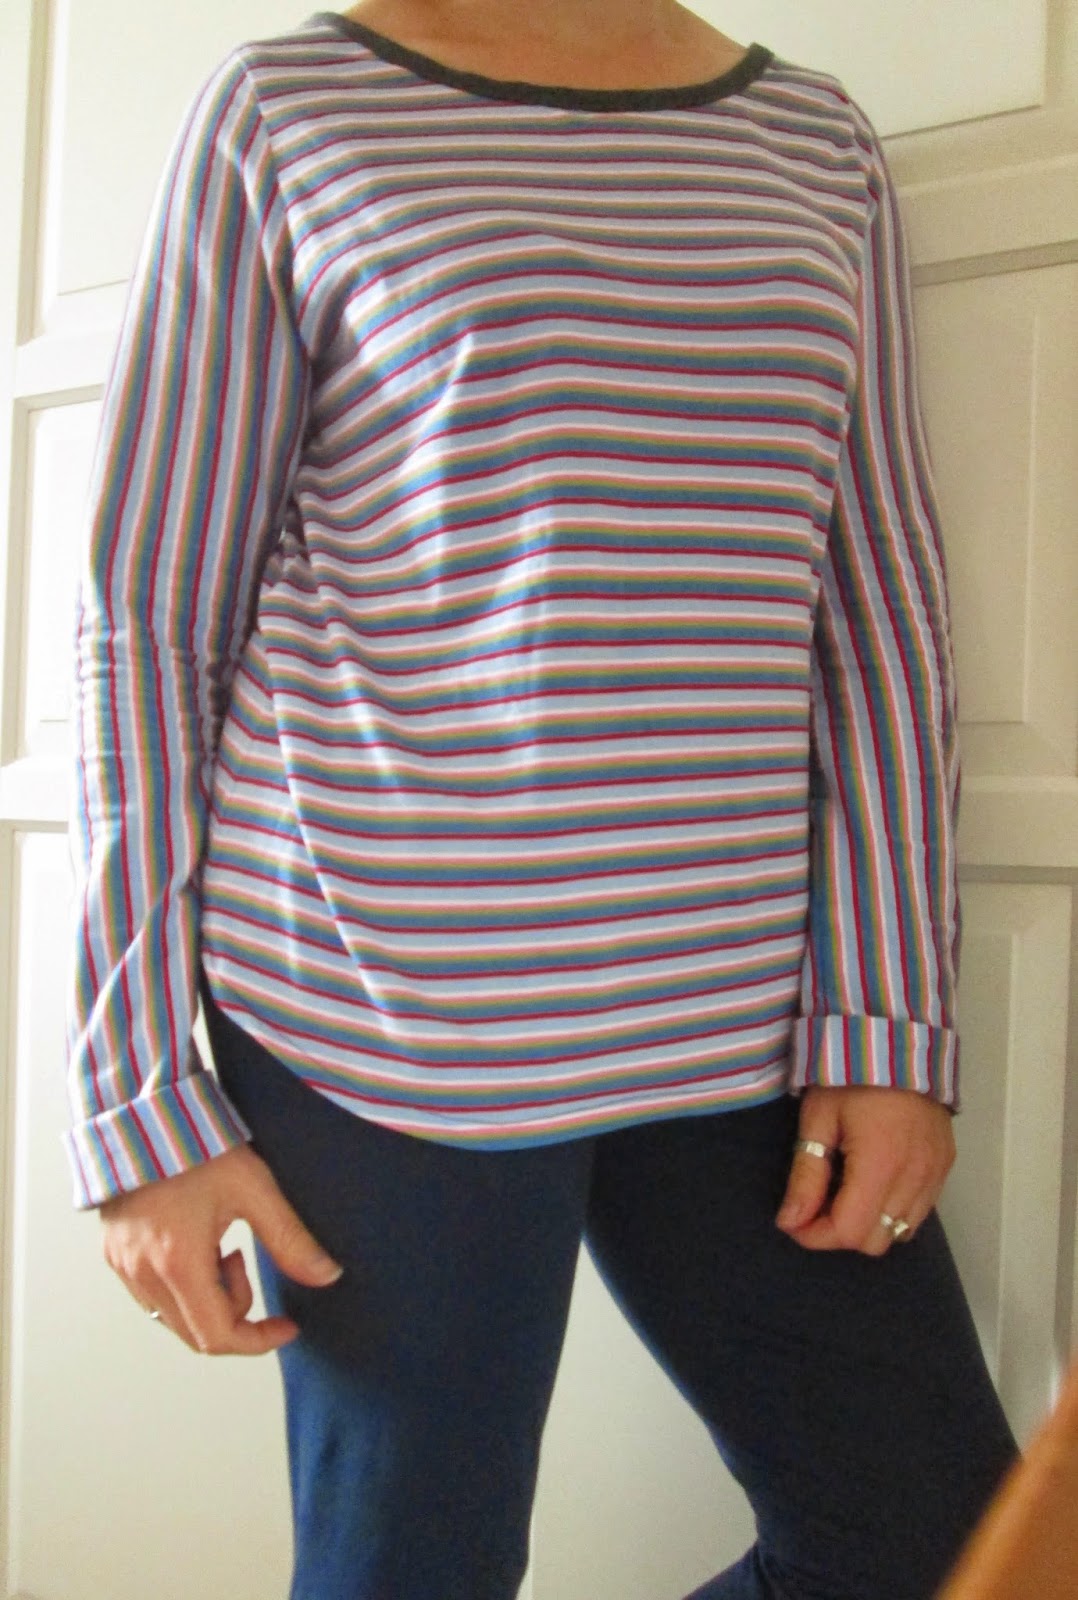
I bought some jersey, it was in the sale, I need some long sleeved pyjamas, I am getting cold at night now.


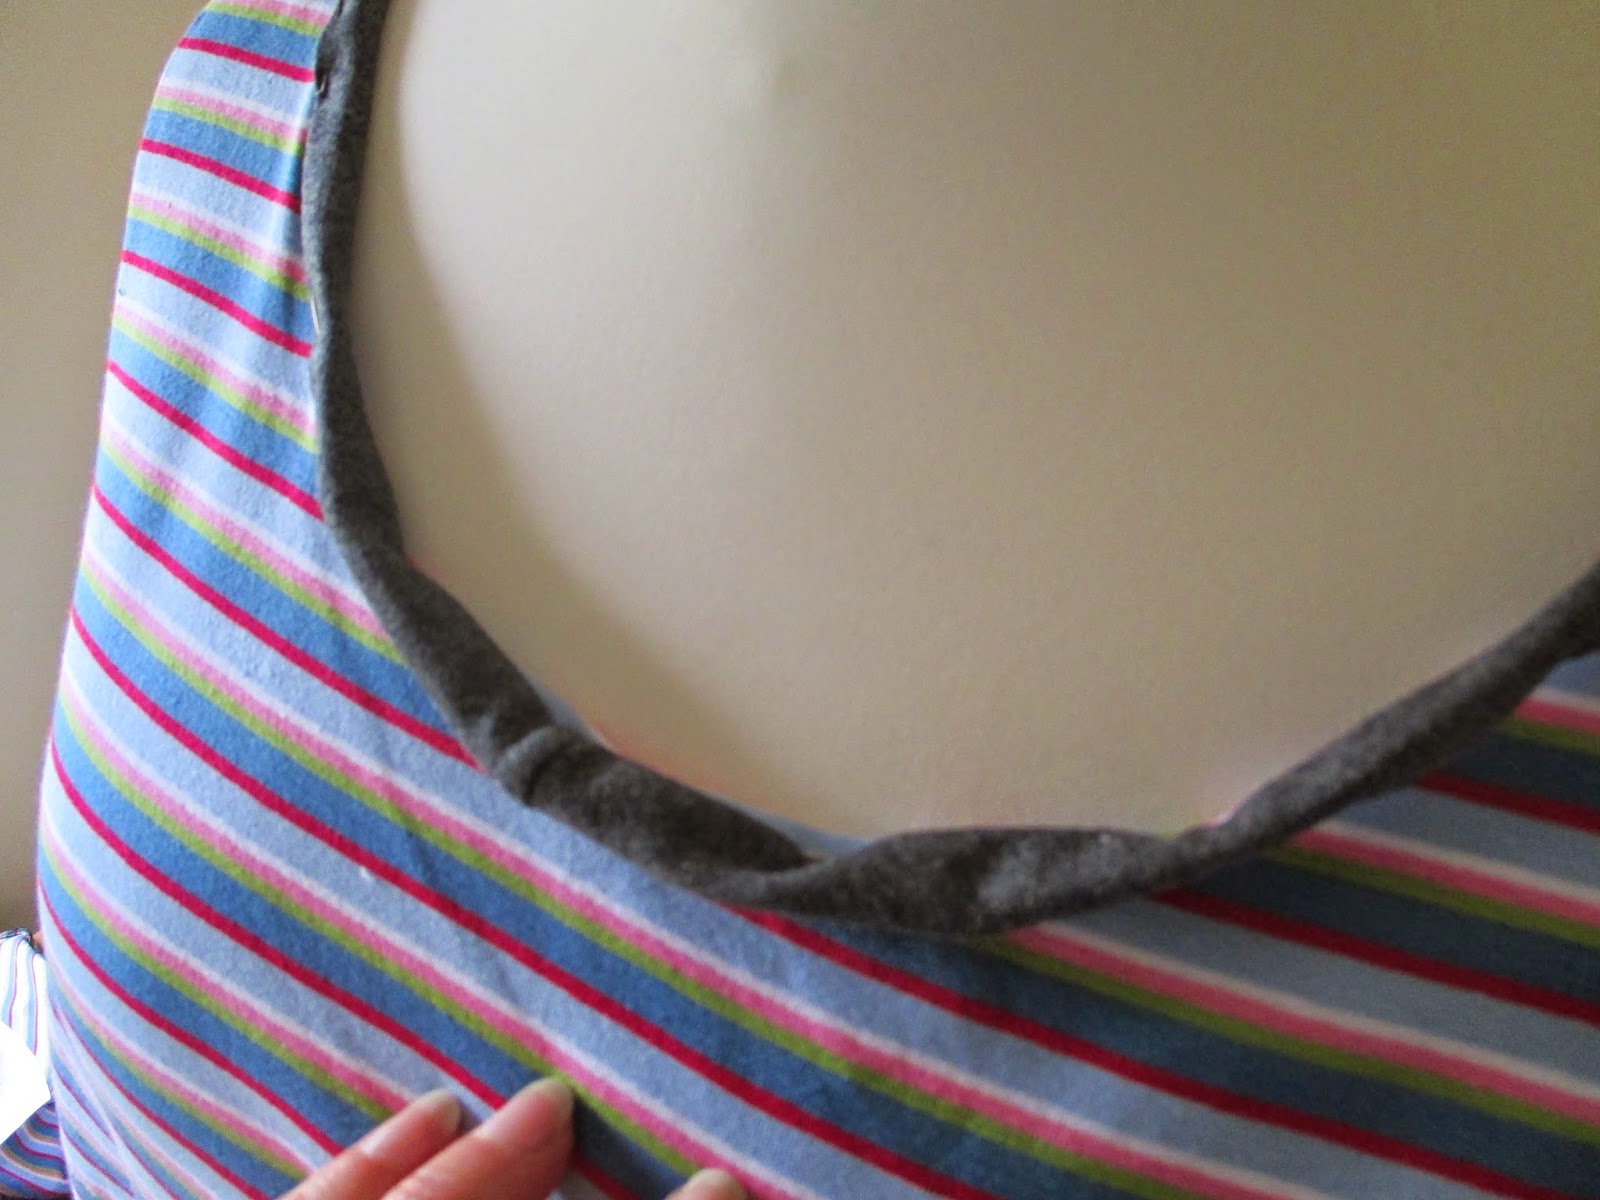
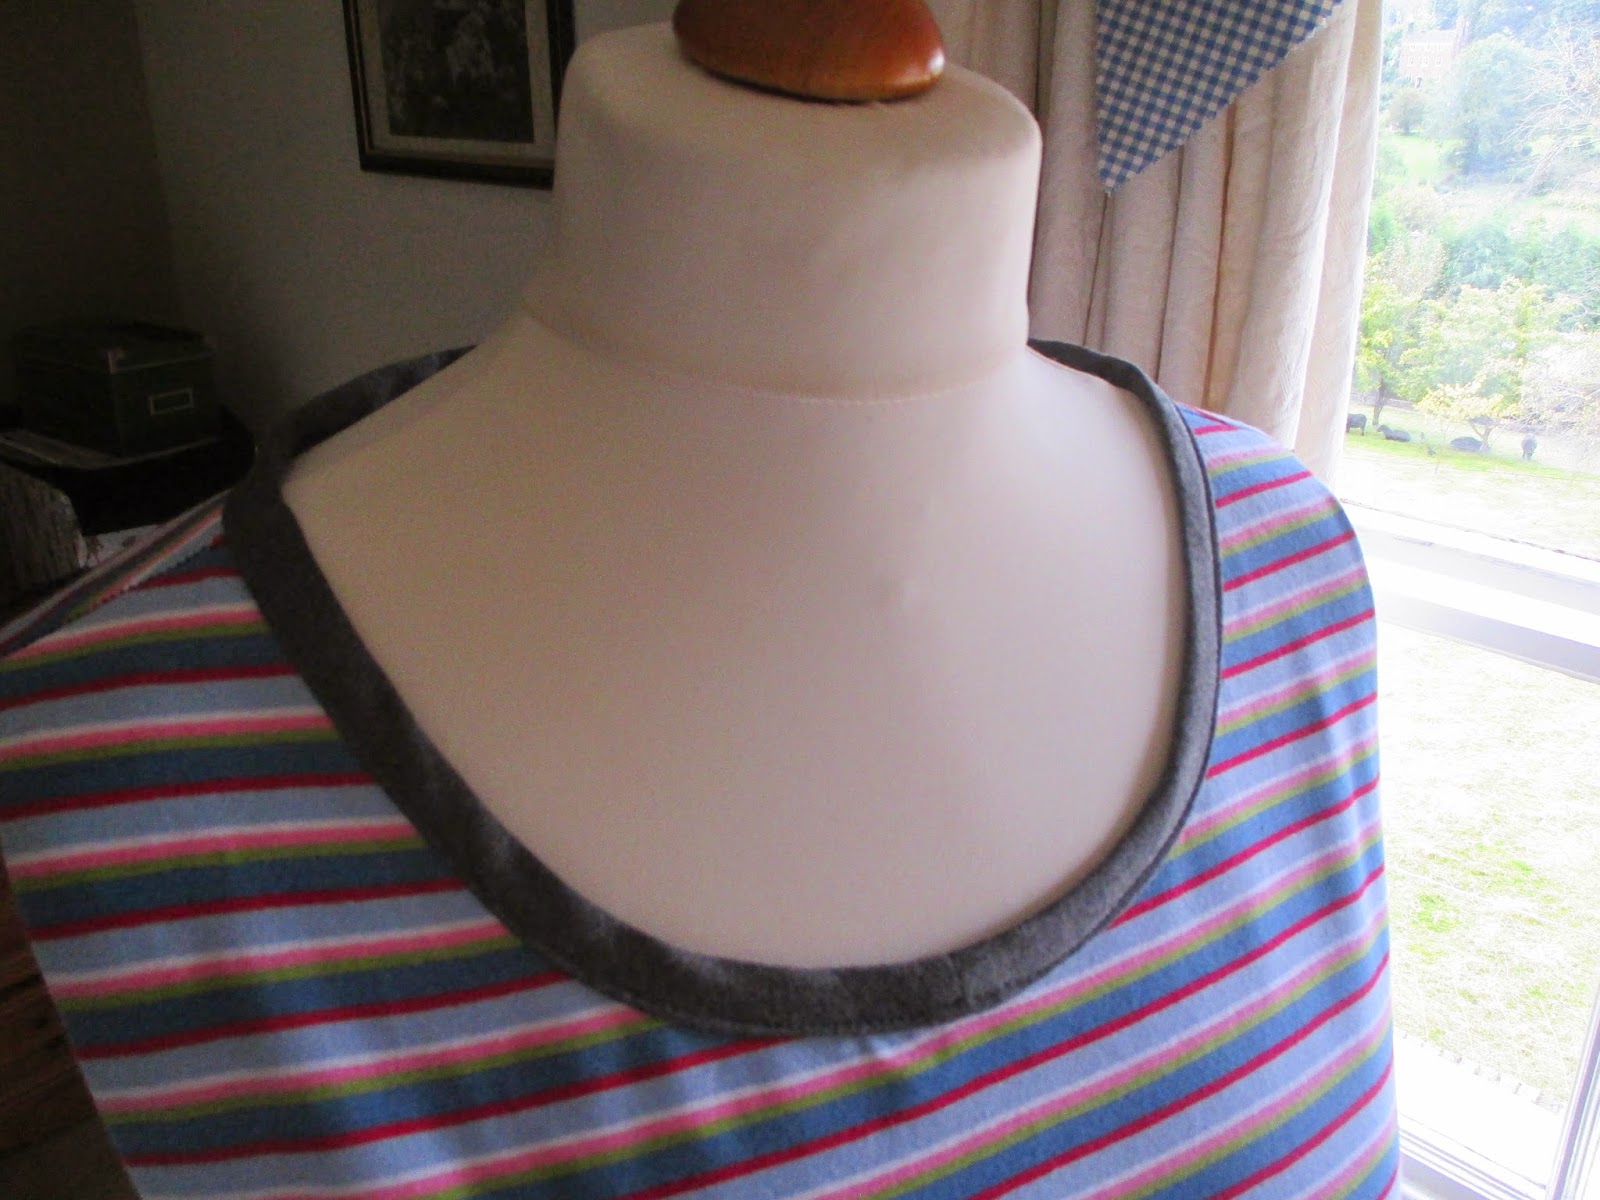
It was all going well and then I used some contrast jersey for the neck binding because I didn't have enough of the stripy one to get the full neck length. Look what happened to the neck? 


I did not stretch the binding enough and so it was too slack. I unpicked it, did it again and took photos for a quick tutorial so that it doesn't happen to you.


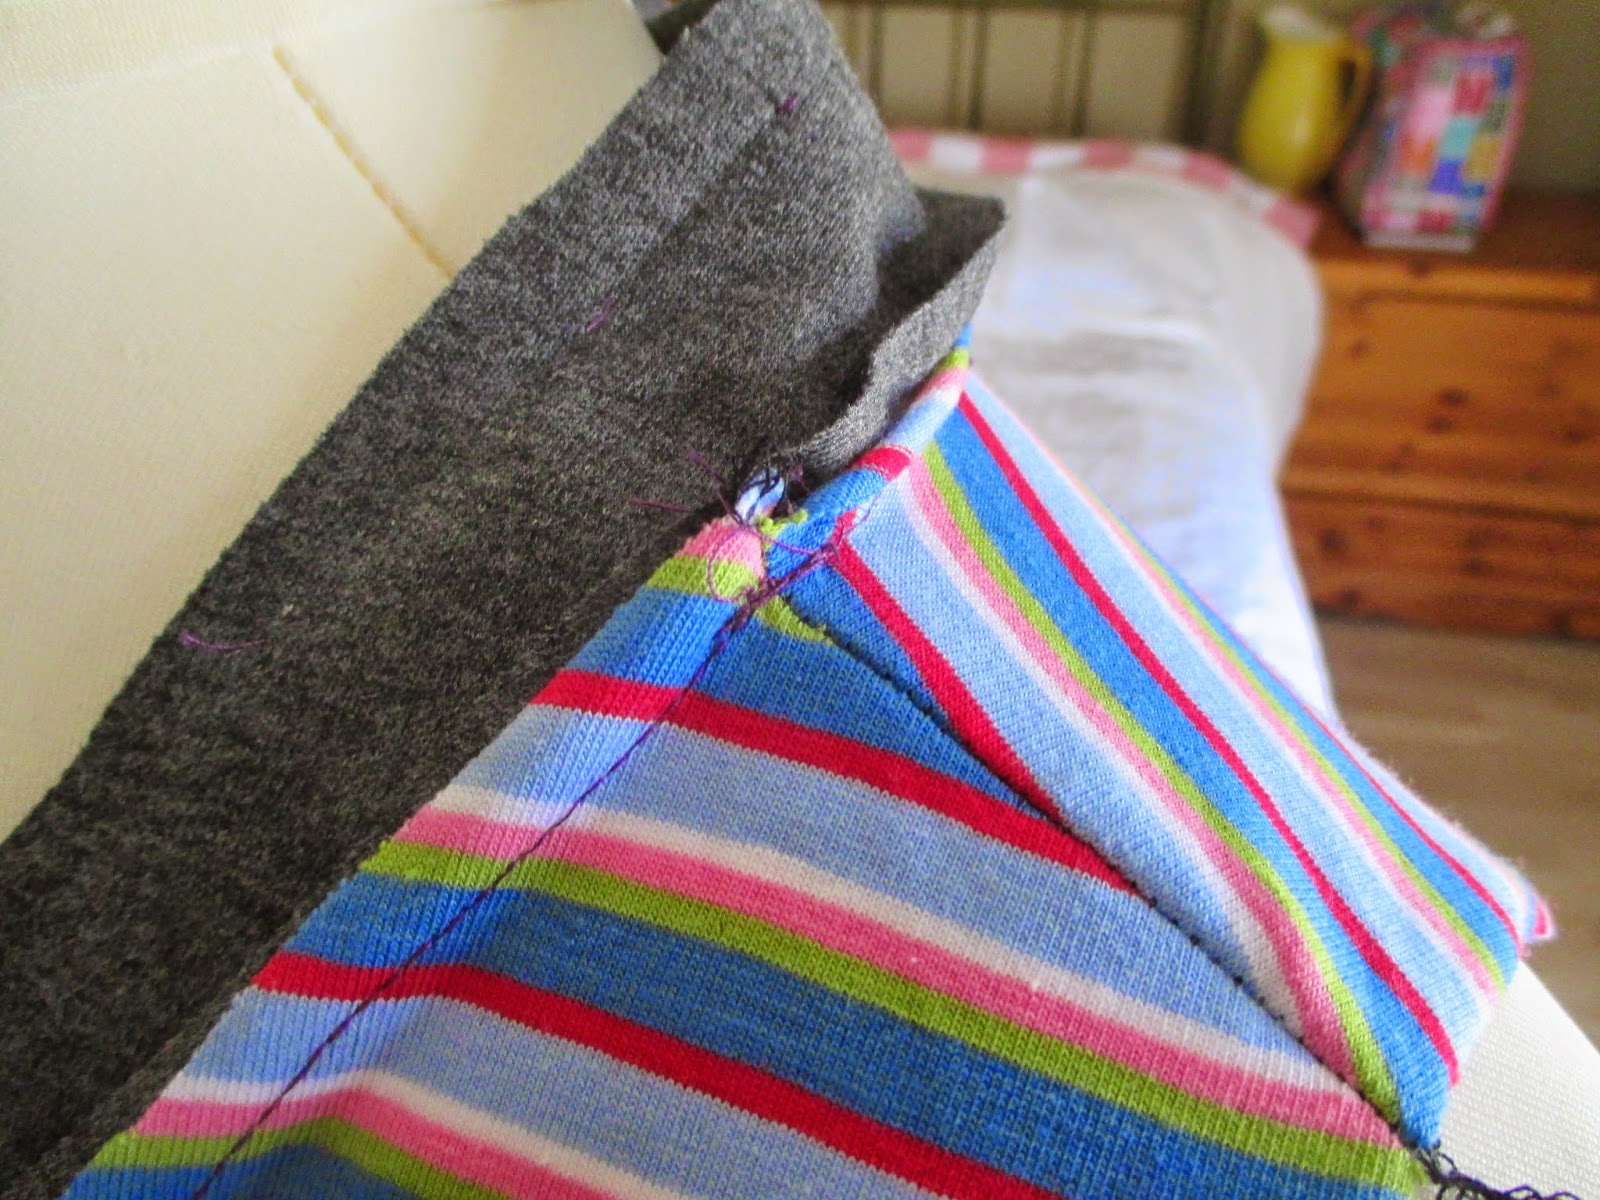
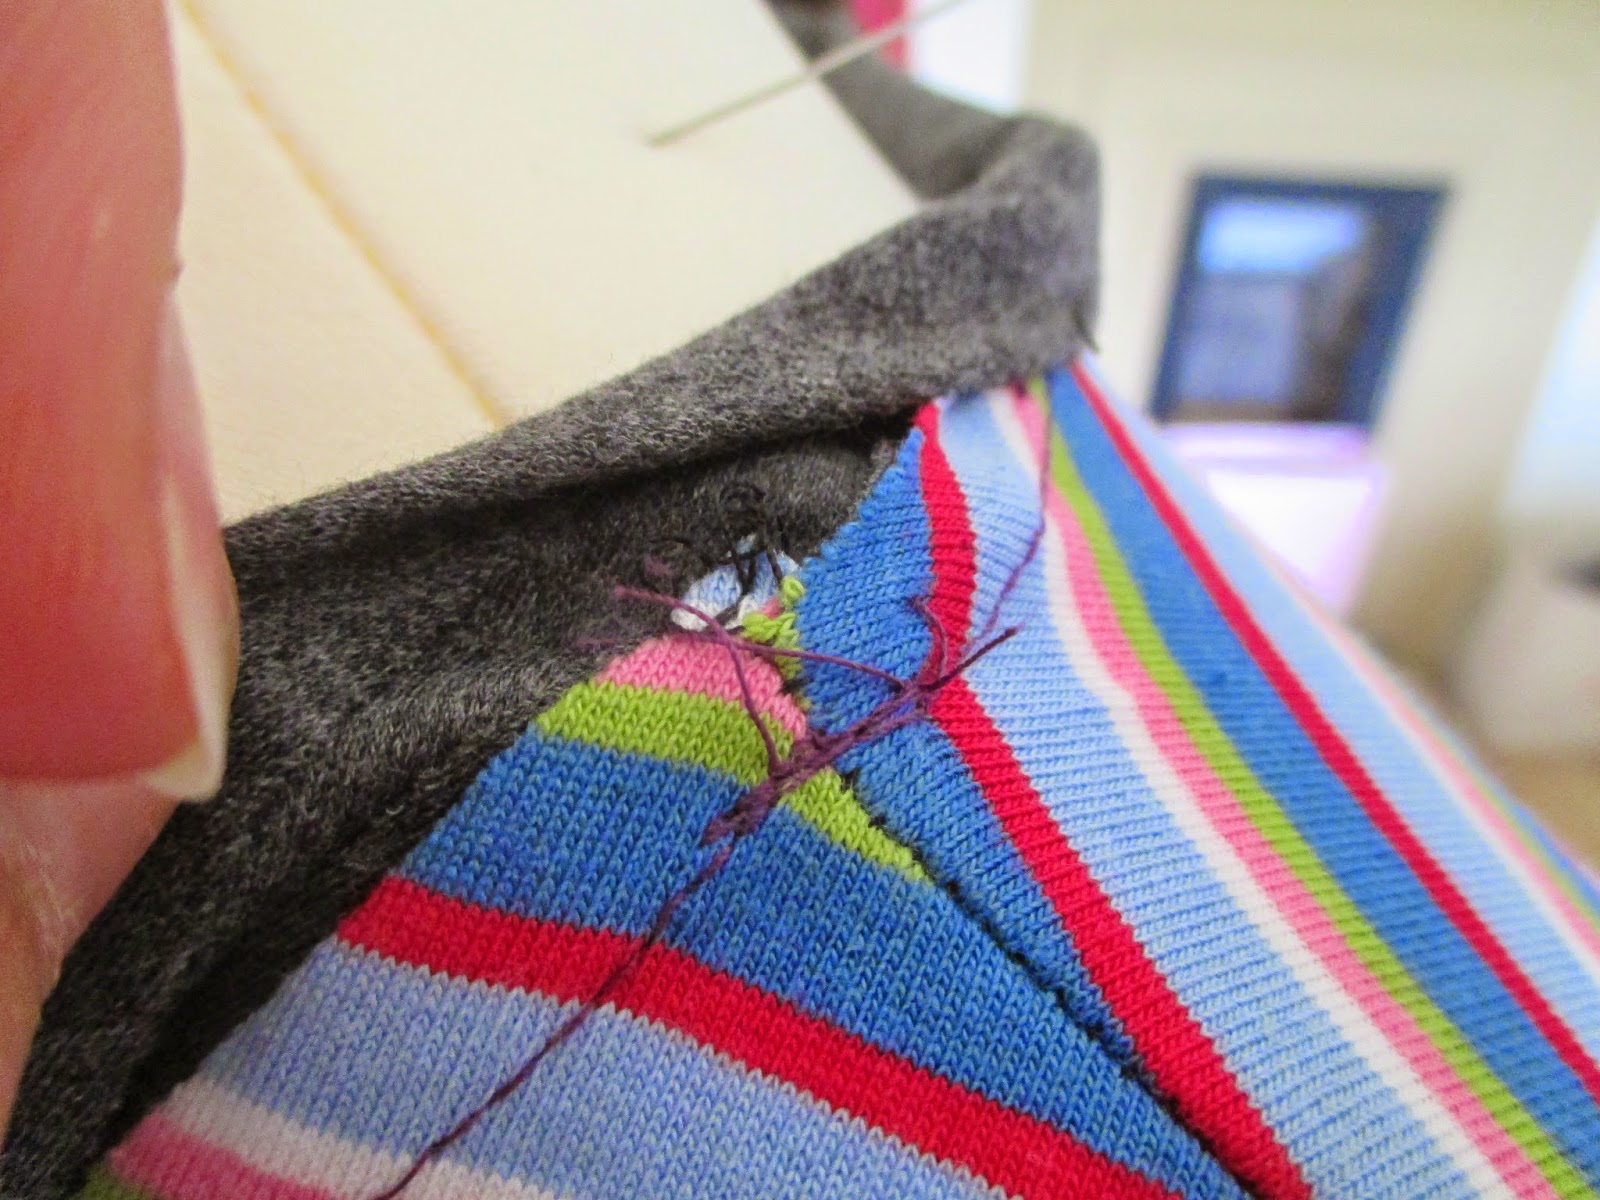
Stitch the neck binding into a full circle. (Ignore the fact that mine has a join in the centre front, I still needed to squeeze the piece out of the grey!) fold it into quarters and mark the quarters with chalk or pins. Pin the neck binding to the centre, centre back and two shoulder seams using the marks you have made.  Now stretch the fabric as you pin it to the neckline between these points. It seems a harsh stretch but it will be fine. 


I sew my neck binding so that the seam appears on the outside. Then I fold the binding over and top stitch with the right side facing me, then I know exactly what the outside finish will look like.


Ahh! much better.


I made the stripes on the sleeves horizontal for a real pyjama look. The pattern is Autumn Mood which I made as a tunic with short sleeves and pockets but here it is the same pattern pieces but long sleeved and short with a curve on the bottom.


yawn.... bit tired and all cosy but it is time for the school run. Better get a scoot on and change into my clothes. I'm starting to get stuck into my Autumn handmade wardrobe now. 

Wakey! Wakey! Jo xxxxx


Friday, 29 March 2013

Hooray! Stripy Hoody

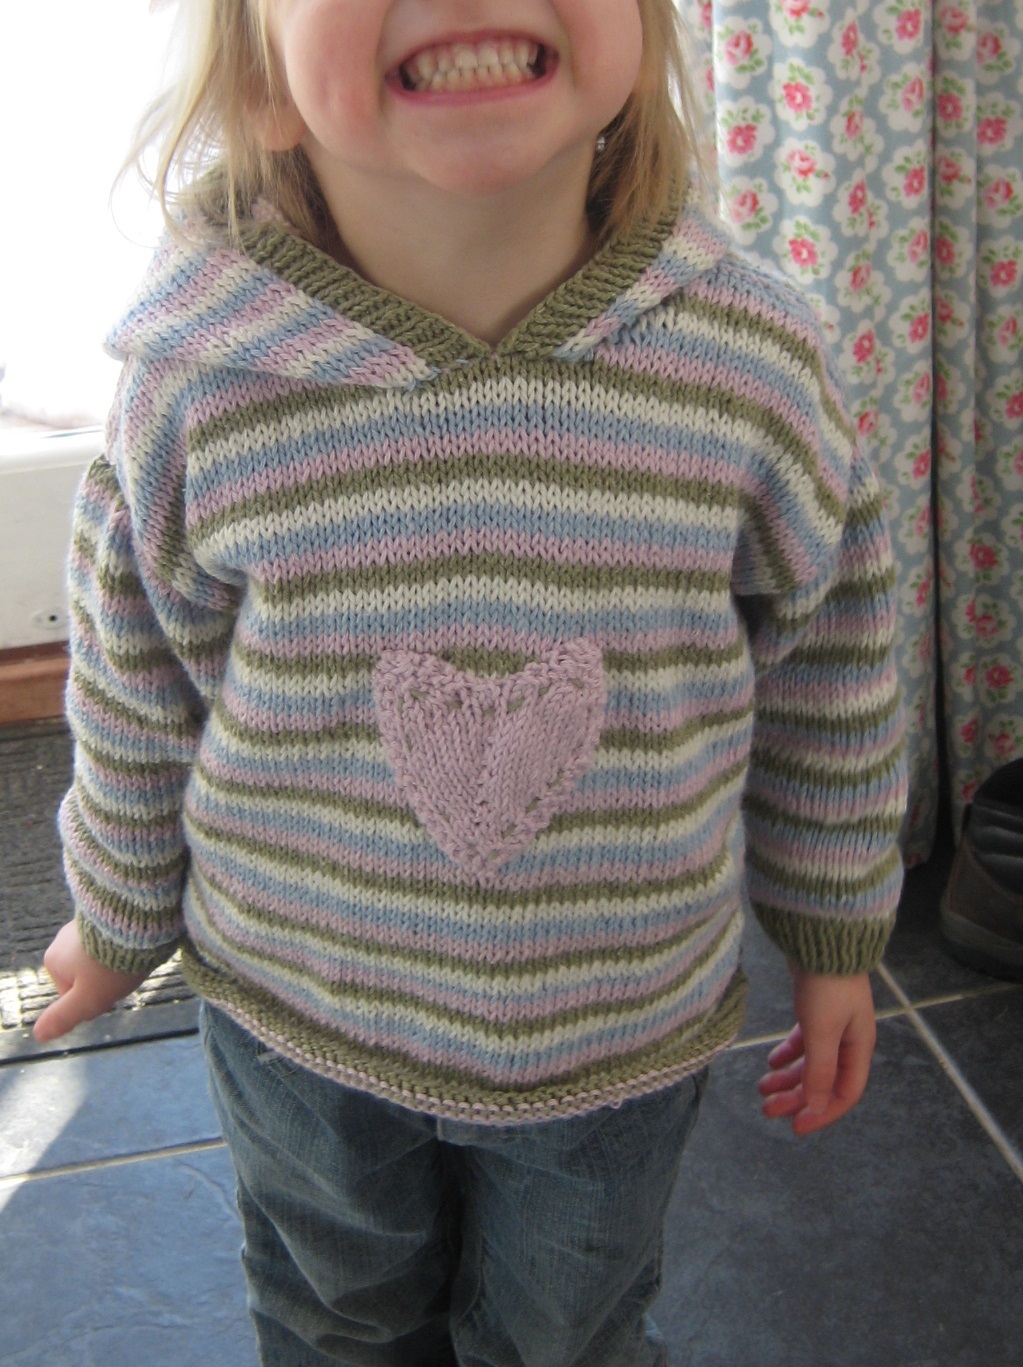
Hooray! the stripy Hoody is finished (you would not believe how many forums there are on the word stripy or stripey!) I put it at the end of her bed this morning as a surprise and gettting her dressed this morning was surprisingly easy.

So, quite pleased then...


She even ate her breakfast wearing the hood to perfect this fuzzy hair...then it started to get a bit cold!


I know other people on more beautiful blogs get that lovely staged photo thing going on but it was 8am with an excited girl who would not stand still so I could not get her to stand where there was not a car, milk bottles, garden fork or general garden flotsam in the background so my humble creative apologies.
 
It is not very often you make a jumper out of left overs from a hat - it is normally the other way round but this is what I had already made..


I bought 8 balls of this yarn Sirdar Recycled DK  because Big Sis does not like wool on her forehead so cotton has been much more of a success this winter. She wanted matching hat, scarf and handbag which I then had to do for Little M too. The jumper took just over one ball of each colour because I only knit size 1-2 years because she is so small.  

Love to hear your comments as ever, stay tuned in. Jo xx


Monday, 18 March 2013

Crochet Jar Tutorial 1000

Firstly, hooray! I have had 1000 hits on my blog and I am delighted, it is so motivating to know that people pop in and see what I make everyday.

Look,I'm not the first person in the world to make a jam jar cover but here is a tutorial if you want an idea of shaping and sizes. You obviously have to adjust the 'pattern' to fit your jam jar shape. (UK crochet terms used)

I used a 3.5mm Hook and fine DK yarns all with a bit of shimmer. You can make a chunkier version, just adjust your hook size to your yarn and measure as you go.


Ch 37 as a foundation row

Row 1:
Ch3, skip first 5 chains, 3tr in the fifth ch, *Ch1, miss 2 ch, 3tr* repeat to end. 1tr in the last ch. Turn.
(Doing a ch1 between each cluster makes the work bulge out from the foundation row to accomodate the blow out on the bottom of most jars)

 
Row 2:
Change colour. Ch3, miss first tr space, 3tr in the next space and every space to the end. 1 tr in the last space.Turn. (there is not a ch1 between each now because we want the work to nip in a bit for the straight bit of the jar)
 
 
You can see how the work blows out at the bottom as you make the second row.
 
 
Row 3:
Change colour. Ch 3, 1 tr in the first space, 3 tr in the spaces to the end. (you will need to judge whether you need 1tr or 3tr in the last space but essentially you need to keep the sides straight so use either 1tr or 3tr )
 
 
And so on... keep changing colours and working rows of 3tr in each space until you reach the top of your jar. my Peanut butter jar needed 8 rows in this fine Dk yarn for example.
 
Top row:
Change colour. Ch1, make a row of dc missing some stitiches to nip the work in for the neck of the jar. I skipped a stitch on each cluster and it starts to curl the top of the work in. Work 1 more row of dc in the row you have just made.
 
 
So your crochet part is finished, it has some ends to tidy up and it should be curled in at the top and bottom like your jar hopefully.
 
 
Sew in ends and sew up side seam. This looks unusual but the tight neck will stop in slipping down.


Hooray!Now you can see why I needed a bit of shimmer, I bought these butterflies in a pound shop in the easter crafts section and thought they would brighten up my 'home corner'.


A crochet jar that matches the colour of my crochet hooks, what could be better than that? Hope yours works out well too. Jo xx
 
Chunkier version using some Aran and 5mm hook is here.


Friday, 15 March 2013

Under the sofa

In my desperation to find a project to get stuck into, I dragged out a load of stuff from under the sofa to see if I could find some lovely yarn, maybe somebody hid some there in the night or something, I thought!

I found this:
 
Big Sis chose it to have a stripy hat, handbag and scarf which matched her coat. There was enough to make Little M a set too. On Wednesday I found the left overs Yay!

I checked out my children's pattern books and found this:


I love Sirdar pattern books for children, they are so modern and wearable, in the five years I have been knitting the children clothes they have never refused to wear any of it (I guess that might come as they get older) but I think it is because they are such good patterns. When I asked Little M "Do you like this?" She said "Yes, because I want hair like that!" I wasn't asking her if she wanted a makeover - just if I should embark on knitting the jumper! Funny...


So I have started. She is three and a half but absolutely tiny so I am doing age 1-2 as I am quite a loose knitter too. I am even managing to remember to twist the yarn up the side for the colour changes and it is quite a relaxing knit. So, so far so good.


I really appreciate my new followers and hope you continue to enjoy looking at what I make everyday. Jo x


Wednesday, 13 March 2013

Tragic to tremendous

I sit at the computer everyday and stare at this tragedy:

 
It is made from beer mats covered in paper and laced together with ribbon. It was lovely when I made it at a scrapbooking class four years ago but it has worn out and fell to pieces.

So on my quest for quick and easy crochet projects for beginners I made this in 1 hour:

 
Much easier on the eye and just as useful. I am going to make another one for hooks like this:
 

I will jot down a tutorial on the next one for anyone needing to know sizes but you really just measure as you go.

I am exploring the blog layout a bit more now and have finally worked out how to add a subscribers list Duh! So why not give it a click and keep up with what is being created at Three Stroies High. Chat soon. Jo xx


Friday, 8 March 2013

Stash Buster

I made reference to not having any left over stash to make the beautiful vest here. This is because last Autumn I had a complete declutter and used every last colour left in my basket (and scavenged some from my mother) to make this:


The purpose of the blanket was to get rid of everything in my basket so that I could buy something new. I hate the feeling of looking in the wool basket for inspiration only to feel disappointed becasue it is full of bits that are not enough to complete anything. I also had quite a lot of random bits given to me from passed away relatives which are not always what you want to put your heart and soul into.

 
There is actually a colour pattern going on with diagonal stripes of colour collections which I enjoyed putting together.

 
I love looking at it becasue it is a bit of a memory blanket for me comprising all of the ball ends left over from little jumpers, cardigans and vests that I have made for the girls that they no longer fit into.
 

I particularly liked the green palette but I think you might be noticing that my favourite colour is green - the green favourite jumper, the green choice for the vest etc. The girls like to snuggle up under the blanket on an afternoon when I won't put the heating on!
 
The vest is going seriously off-piste but I am enjoying making up the shape and pattern as I go along. I held it up to my back last night and was 'encouraged' by the man of the house with the comment that I looked like a giant turtle from the back!! Well I love making it and it feels like one of those items that could either be brilliant and bespoke or really a bit strange.... we will have to wait and see.

Happy Hooky. Jo xx


Wednesday, 27 February 2013

Look at these

Please pop over to Cherry Heart and look at this blog, it is fantastic. There are lots of inspirational photographs and some great tutorials. My favourite is this:


I am all out of scraps at the moment but when I have accumulated some more these are at the top of my hit list. I have put them in my favourites on ravelry.
 
 
Happy Wednesday! Jo xx

Friday, 22 February 2013

Recorder tube tutorial

This is my first ever tutorial which I have written down so forgive me if there is anything I have forgotten to say that is still in my head. Let me know if you make one and how it goes.

Crochet in one colour or use up bits to form stripes. For stripes, 2 rows each of the subtle colours with 1 row of a strong colour makes a good combination. Use either all acrylic or all cotton fibres. I used DK cotton on a 3.5mm hook to make it a tight fabric texture.


Chain 60. (foundation row)

Ch2, miss first 2ch then dc into next stitch, dc into every stitch to end.


Continue dc in every stitch with a single turning chain at each end. Change colours if you wish and don't forget to crochet the ends in as you go.


Continue until you have made 20 rows and your work looks like a rectangle. Fasten off.

At one end, which will be the opening, do 22dc across the end.

Turn work, ch1, dc 11 sts, ch2. These will be the lid/flap and you will be working on these 11 sts thus:

Miss the first chain, dc9, ss in the last st.Ch2 turn
Miss the first chain, dc7, ss in the last st. Ch2 turn
Miss the first chain, dc5, ss in the last st. Ch2 turn
Miss the first chain, dc3, ss in the last st. Ch2 turn
Miss the first chain, dc1, ss.


Chain 8 to make a loop (or however big your button is) and ss into the first chain to complete the loop.


Add a button and sew up the sides catching each stitch with its opposite one to make a neat edge. Turn the right way, insert the recorder and hand to a small budding instrumentalist.

 
Let me know how it goes, modify it, make it your own but I hope you have had some inspiration to get started. xxx