Thursday, 10 August 2017

1960's Hemlines

You really do have to take a second look at a dress you have made but never really worn. What on earth was wrong with it?
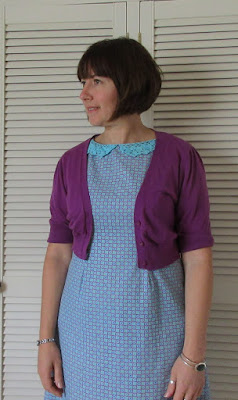
 
 It was a good colour, I had a cardigan and shoes to go with it, it had a beautifully detailed collar I crocheted myself and it was 100% cotton. What was wrong? 

I wore it to work last week to find out. Oh yes, after a days office wear, I found out. It was too short. Every time I had to swing round on my wheelie office chair I pulled it down a few inches. I suppose it was a vintage pattern from 1968 so short hemlines were very much in fashion then. Possibly the way women were viewed in offices was different then too but that is a whole other story!


I decided to use a variation on my pillow case edging tutorial (on the left bar) to give the hem another inch or so. 
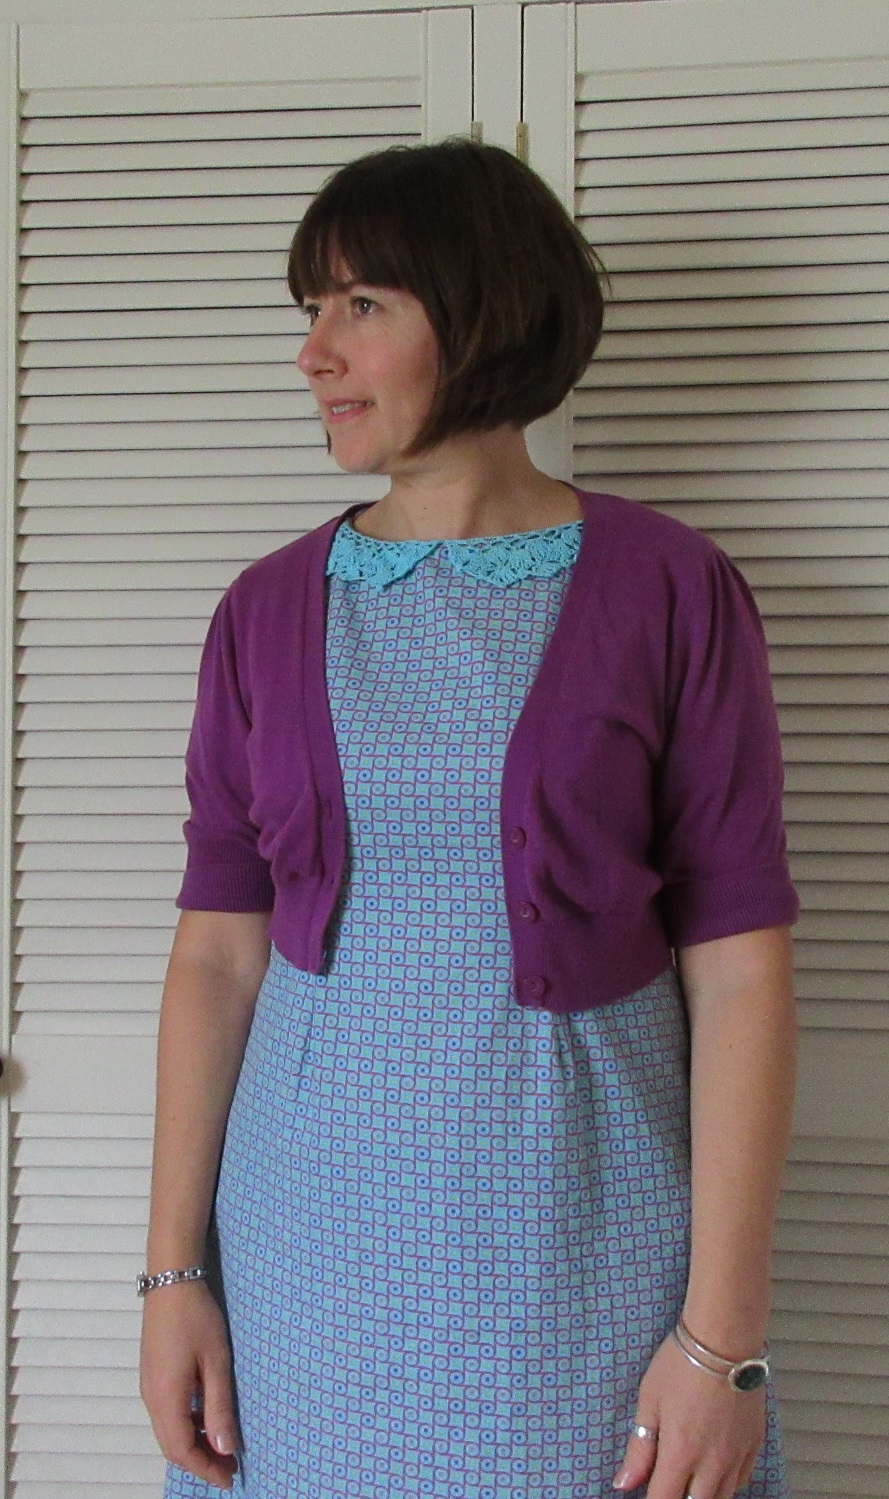
Size 30 crochet thread
1.75mm hook

First make a row of blanket stitch across the edge of your hem where you want the edge to be attached to.


Row 1: Join yarn in the first blanket stitch. Ch1 to start, make 2dc, ch1 in each blanket stitch to the end. Join with a ss to first chain.


Row 2: Ch3 to start,1tr into each dc and 1tr into each ch all the way to the end. Join with a ss into the top of the chain 3.


Row:3 4ch to start, *1tr into next treble, 1ch, miss 1tr,* repeat from * to *. join with a ss to the top of the first loop. 


Row 4: 3ch, 1tr into the first ch space, *2tr into the next chain space* repeat from * to * to end.


Row 5: Pointed edge as follows: ch1, 1dc in the first stitch, miss 2tr,(3tr,3ch,3tr,all in one stitch) miss 2tr, 1dc, miss 2tr, repeat fan shape.. Repeat to end.
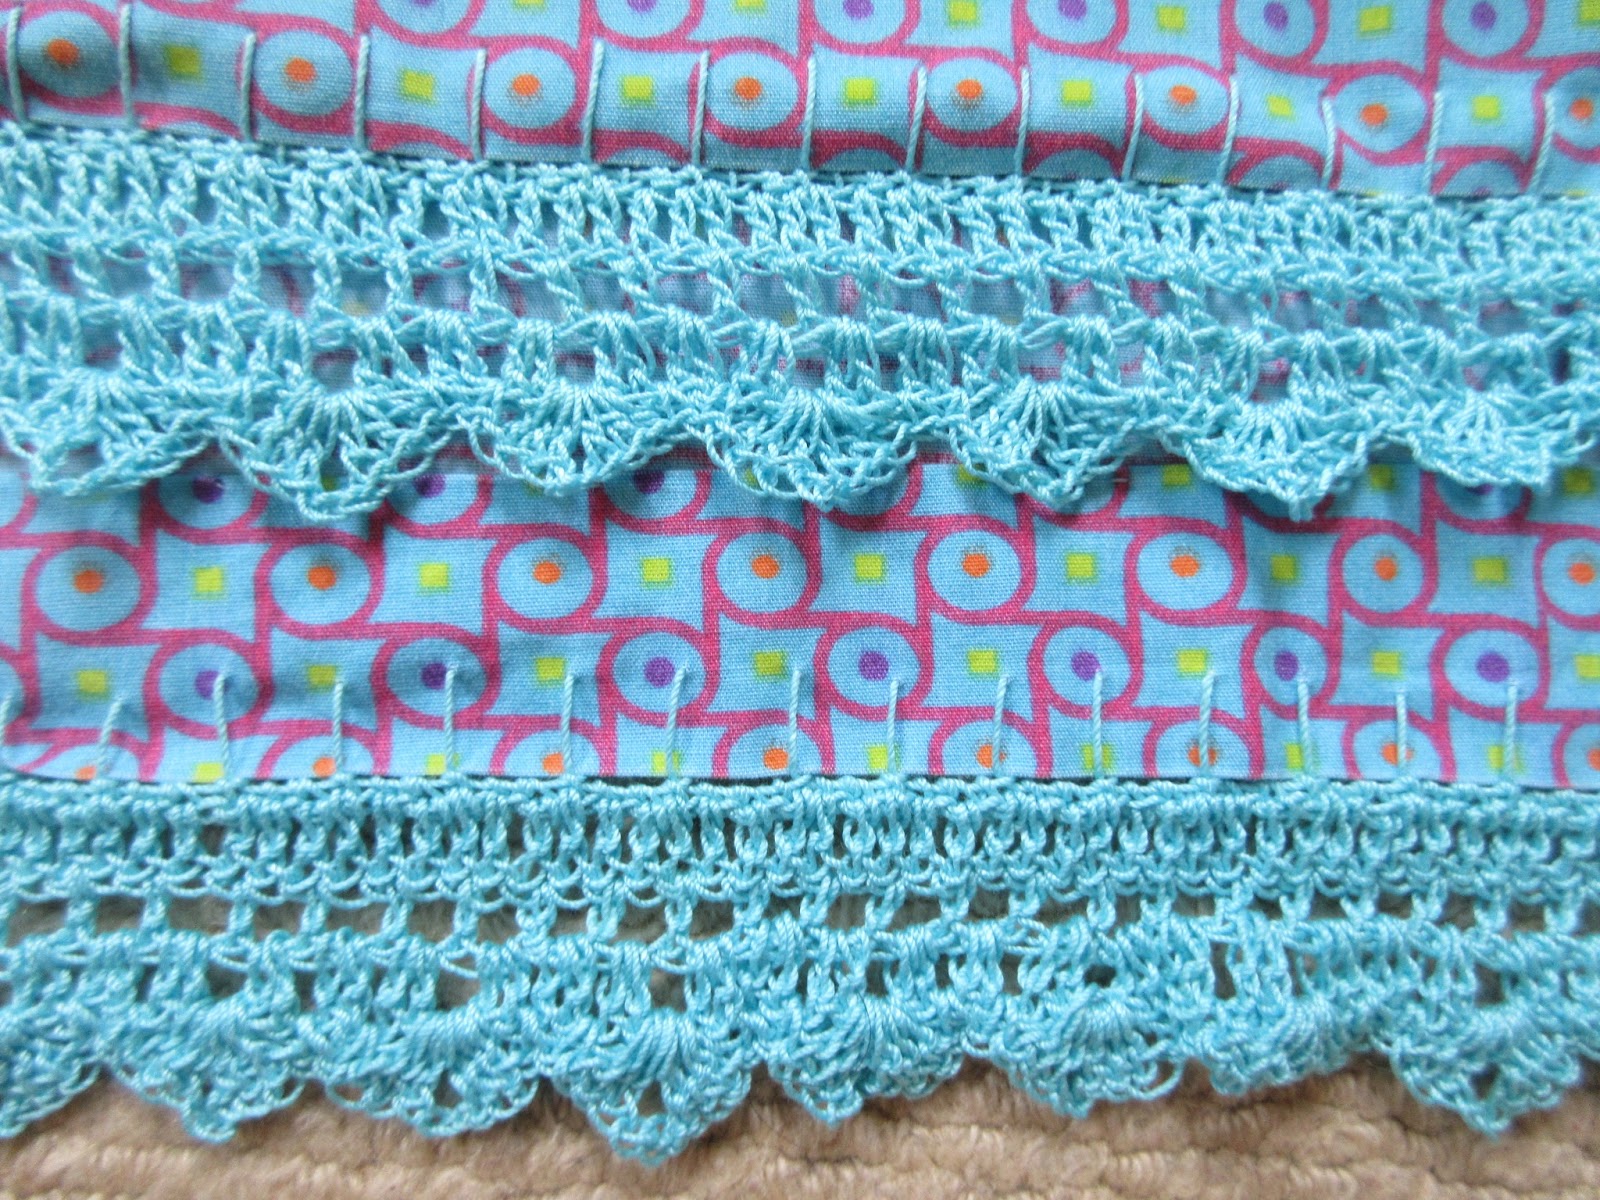
Fasten off and admire!


Much better and I am really looking forward to wearing it again now. I have been having a wardrobe sort out if you haven't already guessed. Some stayed, some went, some was re homed to friends, some went into a revisit pile like this one. 

I am back in love with this dress now. Happy days. 
Jo xx

Tuesday, 8 August 2017

The Weird and the Wonderful

We have had a few Weird and Wonderful summer days.


Growing weird 'Cucamelons'. Yes, it is a thing. My mum has been growing them in the greenhouse. They taste like cucumber but with a zesty lime hint.


Wonderful teamwork on our bi annual sanding of the kitchen table to remove glitter, glue, felt pen marks and spagetti bolognese, oh yes, and nearly all of the patch I scorched with a cast iron casserole pan in the middle...


The effort reaped wonderful results once it had a new coat of chalk paint on the legs. (Aldi £4.99 and went on like a dream)


Reviewing the dogs weird obsession with eating his own blanket. I cut every one of those squares. *tusk* It is now in the bin.


Wonderful outdoor playing with best friends.


Wonderful birthday presents and she decorated her own cake...


Choose whichever 'w' word you want for that photo!


Wonderful recipe following for bananas in pyjamas.


My wonderful girl and me.


The others didn't like hot bananas so that makes them weird in our eyes.


Wonderful birthday cabin dinner all round.

What is weird or wonderful with you this week?
Jo xx

Friday, 4 August 2017

Circle Wave Knitted Gloves

These have been a very enjoyable knit. They have taught me that sometimes I just like the process of knitting. I was not in real need of fingerless gloves but I wanted to knit these for knitting sake from the beautiful book Knitting from the North by Hilary Grant.


It started way back in the school Easter Holidays in April with some portable park knitting. Jeez, those dark mint kitkats are moreish.


I transferred the work from DPNs onto an Addi Sockwunder knitting needle. This was a new craft purchase because I did not have any 3mm DPN's. I wanted to see my work more clearly than on four sides to check for errors that might emerge in the pattern. It is a great tool and I will be trying socks on it soon. One end is shorter than the other and the points are supper pointy and smooth. It is only 25cm long.


The stitch markers show the front and back of the glove. I had to follow the chart twice once for the back and once for the front.


 At row 37 I learnt a new skill. The pattern asked me to knit 8 stitches with waste yarn and continue to follow the pattern. My fingers are short so I had to reduce the overall number of rows.


Grafting a thumb sounds like a tricky business but it is easy if you do what the book says...


 Pick up 8 stitches above the waste yarn and 8 stitches below.
  

Carefully snip the waste yarn like you would on a steek ( I have never been brave enough to do one so this was a bit heart stopping!)


Spread the stitches over four or three DPN's and knit the thumb. I made a bit of a hash of the first one I made so I unpicked it and tried again - Much better. 


'Out of the strain of the Doing,
Into the peace of the Done.'
Julia Louise Woodruff


It is good to learn new techniques. This project has mostly shown me that I just love knitting for what it is.

Thanks for sharing my joy. Have you ever grafted knitting?
Jo xxxx

Wednesday, 2 August 2017

Lamshade Upgrade

I love a lampshade kit; such instant fun and satisfaction.


I had a tiny bit of fabric left over from my curtains and the cream shade that was on here had seen better, less dusty days. It had tipped over to revolting.


The fabric is a linen silk embroidered fabric and it is truly beautiful.


I used the 20cm Drum kit from Needcraft as I have with all the lampshades I have made. They are not expensive, everything you need is in the box.


Easy to make in an hour and it gives an instant professional finish. 

What crafty action are you up to?
Jo x

Sunday, 30 July 2017

Portland Tie Top

I am still busting my way through my smaller pieces of donated stash. I made a betty blouse with this fabric and had a bit left over. 


There was not enough for anything with sleeves but I loved the top on the front of the Sewing world magazine I was featured in way back in February. It is called the Portland Tie Top.


I decided to give it a bit more of a luxury feel by lining it. This also gave a smoother finish and you could not see any bra lines through it. In fact I am wearing a black one today and no show.


It is a really pretty top and I have been waiting to photograph this since I decided to have my hair cut back into a bob. The bob is a bit short at the moment and I do feel a little bit like a 1940's evacuee but as it grows it will be back to being 1960's bobtastic.


I like the gentle A line shape which works for my hips and covers up my current straining waistband button.


I love the cut of the collar from the front. It looks severe but it is really comfortable.


Feel like a night out now. Jo x

Thursday, 27 July 2017

Doodle

This month Big Sis chose a project from Minerva. A stretch fabric with a doodle pattern and a dress pattern with plenty of variations. Minerva have quite a range of stretch jersey fabrics at the moment which would be perfect with this pattern. 


She chose View D from McCalls M7079 with the softer waist fitting rather than gathers.If you have an overlocker this project is a breeze. It would also be fine on a regular machine using stretch stitch too.

I made it a while ago. She took it to France on holiday because it was comfy to wear on the aeroplane as well as being another outfit with leggings and a cardigan for later in the evenings.


There was just enough left over to make a long sleeved T-shirt for when the sunshine has gone away and Autumn pops up again. AND Little M asked if there was enough for her to have a bit of the fabric too. This pattern is one of my favourites from Ottobre.


Thanks for dropping by. Jo x