Showing posts with label Tutorial. Show all posts

Saturday, 13 January 2018

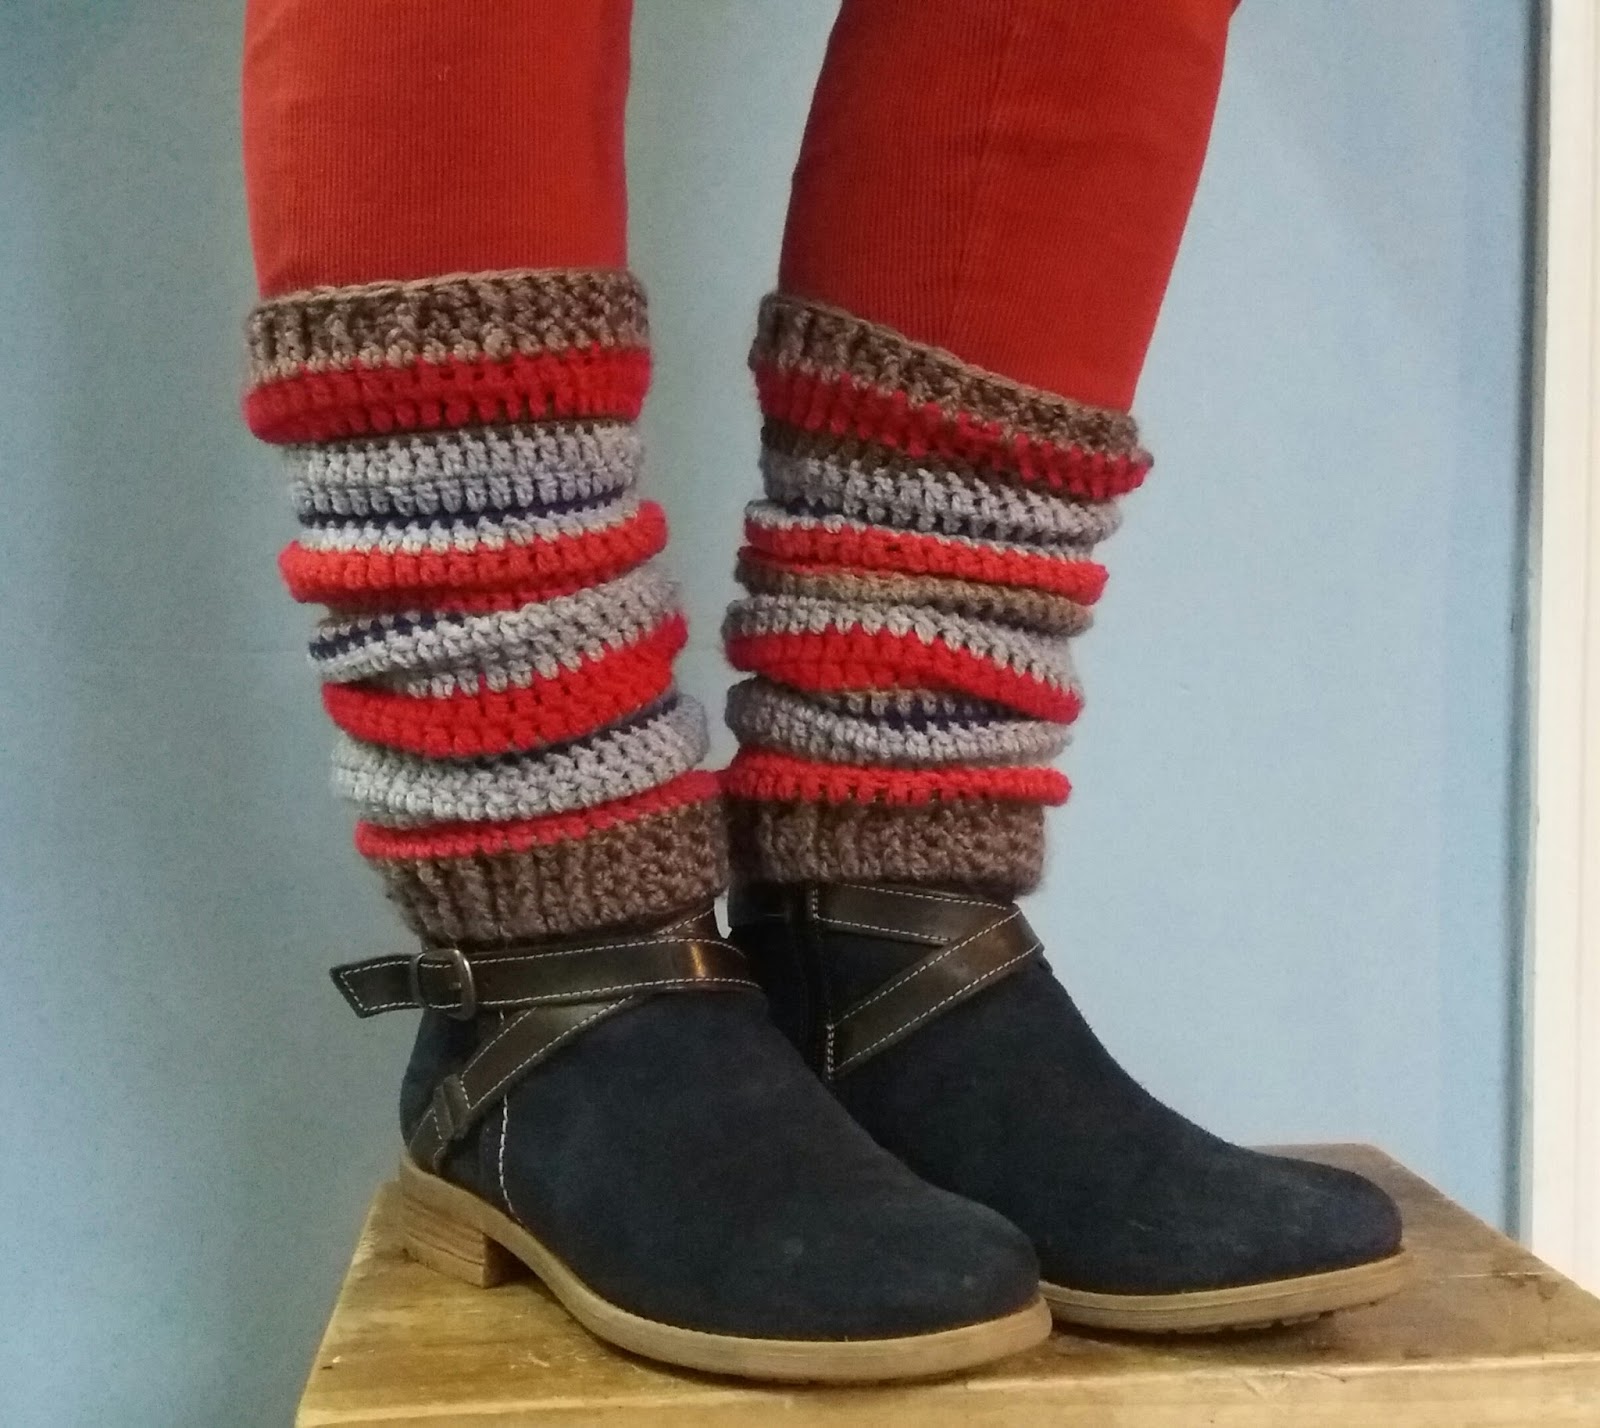
FREE Legwarmer Crochet Pattern

Just what the weather ordered here in the Northern Hemsiphere: stripey crocheted leg warmers.


Here is the pattern if you would like to make a pair. Make them plain or go wild and stash bust. 

4mm Hook
Aran weight yarn
UK terms

Foundation chain: 43 chains. Join with a slip stitch to make a circle. Be careful not to twist the stitches. 

Row 1: Ch3, 1tr in each chain. (43 sts)

Row 2: Ch3, 1tr behind the post of the treble from the previous row. Known as 1fbtr (front post treble video) It should raise the stitch to the front to form a rib. *1tr, 1fptr* to end. join with a ss

Row 3: Ch3, *1fptr,1tr* to end. Join with a ss

Row 4: Repeat row three. £ rows of rib complete. This is the ankle end of your leg warmer because the foundation chain makes it less stretchy than the final row.

Row 5: Change to main leg yarn or first colour. Ch3, 1tr in each stitch to end. (43 sts)

Repeat rows of trebles changing yarn for stripes or adding rows of double crochet for darker colours. When you have the desired length repeat 3 rib rows for the top of your leg warmer.

Don't forget to allow enough yarn runs for two!


Wear with long boots with them coming out of the top as boot cuffs or ruched with ankle boots.


I can't stop wearing them.

You can save the link to these on ravelry.
Happy Crochet!

Wednesday, 11 October 2017

Our Best Ice Cream recipes

 We have an ice cream maker and it has been making weekly batches of ice cream from May onwards. Here is a little round up of the best flavours we have tried.


Chocolate ice cream in June. With the last of the girls Easter Eggs. I know, they lasted that long!


Blackcurrant ripple ice cream in June. Using up the last of the fruit from last year out of the freezer before the next lot were ripe and ready to pick.


Strawberry and Rose. A flavour I thought the children would balk at but as long as the rose water is subtle it gives the strawberry flavour a real summer taste. This is a lazy recipe which uses ready made custard and is so quick. We picked 4.5 Kg of strawberries from our allotment this year.


Vanilla. The hens are not laying so we are out of eggs but I bought some specially for this. This ice cream uses four eggs with the whites whisked to volume and then the yolks and cream folded in gently but not in the machine. We are currently picking autumn raspberries and eating stewed plums.

Buying an ice cream maker was not a whim gadget purchase. It has been a great way to use up our freezer gluts of allotment fruit. Whatever I made with frozen fruit in the past, the children complained it was just soggy fruit. You can't blame them, it was true but ice cream is a great way to use it, taste it and enjoy it. Obviously we are racking up many more calories but hey ho. 

Do you make ice cream? Share your favourite flavour combinations.

Jo xxx

Saturday, 16 September 2017

Tips for Cutting Out

Today is the day I have swapped my spring/summer clothes over for my autumn/winter clothes. It seems earlier than last year but it needs doing. Everyday I open the wardrobe, dresses that require bare legs are staring back at me and it is just too darn cold. Nearly all of my clothes are handmade now and it has taken about three years to get to that. Some things are past their best so I did some wardrobe weeding too. This is most of what I am keeping.


After finding out my wardrobe wants, I chose some projects for the coming months and got snipping.

Here are a few of my cutting out tips:

1. Always have the pattern to the right of your scissors (if you are right-handed) you get a more accurate cut. If you cut it the other way the paper and fabric separate and you start guessing the cutting line.


2. Measure yourself and key points on the pattern. The crotch on these would have meant the waistband was nearly touching my bra so I made an adjustment. Make a muslin if it is a new shape for you.


3. Stop and think if any of your adjustments will effect other pattern pieces. I needed to also adjust the pocket which was going to join onto the side I had just shortened.


4. Transfer all of the markings with chalk or tailors tacks onto the wrong side of the fabric. You are a fool to skip this and do it at the sewing stage. You will need to get all the paper pieces back out of the packet again. Do it now!


5. Don't ignore notches. I cut mine into the seam allowance but you can make little triangles pointing out or mark with chalk if you think it won't rub off. I cut inwards because I use an overlocker to finish my edges and I can still see them through the stitches whereas if I make triangles pointing out the cutting blade cuts them off and I am non the wiser.


6. If you know it will be a while until you sew it. Label your pieces, especially the ones that look similar.


I have shared this routine of mine before but I like to cut out in batches. Over the last three days I have cut out trousers, a skirt, a jacket, child leggings, child skirt, polo neck top, a dress for Little M and some napkins. I have no idea when I am going to make them but they are all bagged up with the thread and notions for when I fancy a sew.

Have a great week. Jo xx

Ps. the dog has already eaten a reel of cotton since I took this picture. Pesky hound!

Sunday, 23 July 2017

Sampler Quilt Backing and Building Tutorial

It is time to assemble my sampler quilt and I would like to take you through the process if I may. My Auntie showed me this great technique which is definitely worth sharing and bookmarking.


After adding solid borders to each sampler block, it was time to make last minute cutting decisions to help with accuracy. I trimmed each one down to 34x34cm. I purchased a single sheet from a charity shop for the backing. Seriously, £1.99 and it looked as if it had never been on a bed. The others are solid colour left over bits I am keen to get rid of.


Next it was time to lay out the design ensuring the samples which were similar in pattern were not close to each other. They were sewn into 3 strips of 5. I am going to work on each strip separately. 


Each strip has the backing and wadding attached with safety pins. Always ensure some fabric is overlapping to allow for movement. Use safety pins so that you don't keep stabbing yourself when guiding it through the machine. 


Now I can easily machine quilt these under the sewing machine. It is not too wide, too unwieldy or too daunting a task. I have a new stitch-in-the-ditch foot which allows me to sew either in the ditch or just on the edge (if you look closely on the blue) depending on where I set my needle. 


Then the magic happens to attach them all together. You use bias binding to join two strips together. Finally, add the last strip of five in the same way. You should now have a quilt topper which is backed and machine quilted but has gaping seams at the back.


Next, sew bias binding by hand over the back joining seams after you have trimmed them to meet in the middle. Don't over trim them with a gap or you will have a floppy weak point running all through your quilt. 


Then to complete the quilt use bias binding to encase the outer border. This is 30mm wide bias from Frumble. I really like to use it.

I also included some hand quilting but purely because I like doing it and I am not very good at free motion quilting on my machine.


See, it looks good and Little M, aged 7, really loves her Sampler quilt.


 I was so excited to finally find a way to part machine quilt without swearing, sweating and shoving my carefully made large topper through my tiny machine aperture.


Starting at top left:

  1. Half Square triangles - left over from a double quilt in 2015
  2. Diagonal stripe - using up thin strips
  3. Brick wall - using really small pieces
  4. Fussy cut framed butterfly - using a saved piece of fabric
  5. Half Square Triangles - demo piece from sewing class
  6. Fussy cut with applique butterfly motifs
  7. Crazy quilt technique - no measuring required
  8. Postage stamp block - 10cm blocks
  9. Log Cabin strips
  10. Postage stamp
  11. Applique hearts
  12. Brick wall
  13. EPP eight pointed star - pieces already made from a bigger one
  14. EPP hexies - I will NEVER make whole a hexagon quilt
  15. Patchwork squares
If you want to know how to make these you can use the labels on the right to look up patchwork and they are the latest ones.


Let me know if you like this method of backing. 
What do you think?


Jo x

Tuesday, 6 June 2017

Happy Colours Blanket Hooray!

I rarely stick to a pattern; that would require me to purchase the correct materials. So this project was inspired by The Happy Colours Blanket from the book Boho Crochet by Marinke Slump.


 I made 24 squares and could see that I was going to run out of white. Not wishing to purchase another ball I decided to make some solid colour ones to use up the yarn I did have. It was a no brainer for me, I am flexible, not a perfectionist.


I think it just makes it happier!


Some of you have asked how the pattern and crochet is so neat in these motifs. You have good reason to ask you observant crafters because I use a technique called a standing treble. I have adapted a photo to show you why I do it and indeed why you should learn it if you are a crocheter.

The black arrow indicates the chain 3 which is used to start the first round. When I inspected the picture I could see it there all skinny and long. I could also count the 11 trebles in the rest of the first round which all look the same as each other and are a little fatter.


Now, if every time I start a new colour in that same place with three chains I would end up with a skinny line of chains which don't quite bulk out as much as trebles. This is where the standing treble comes in. So after the blue round I cast off. Then joined the green in a new place using a standing treble which you can learn here on a blog called Moogly. The tutorial is in photos or as a mini video. It is also shown for left handers.

The green arrow shows it, it was harder to find for various reasons. a) it is a bit fatter and b) you can join in anywhere. This avoids an obvious line where the colour is always joined. Green is then cast off at the end of the round.

The red arrow shows where the red was joined but this was hard to find as well.etc. etc. In fact I could not see which was the first stitch in the white round so I left it unmarked because I think you get the gist now of what I am trying to show you. Suffice to say that if I can't find it and you can't see it, it must be a great technique.


Try it. It works on granny squares or any place you need to change colour. It is a technique you will be glad you took an hour or so to learn.

I used a bamboo hook from DMC to make this and it was surprisingly good. Lightweight and snag free on these stylecraft yarn scraps. These are the ones I did not use - maybe another project for those..


The border is made using a row of double crochet in white, trebles in green, double crochet in mustard, trebles in blue and finally that blanket border favourite of mine - crab stitch creating the fine rope border.


Baby Blanket all done ready for my friend in December and I will also put it in our local craft show in September.


It is, what it says it is - A Happy Colours Blanket.

Jo x

Sunday, 15 January 2017

Self Drafting a Jersey Skirt

 I had some Ponte Roma stretch fabric left over from a tunic dress, it had to go. There was not enough to make a top but I felt sure there was enough to make a stretchy jersey skirt.


The fabric is 20% stretch. To check, I measured 10cm and then stretched the fabric to its limit. The blue pin reached 12cm so it has 20% stretch.


Next I measured my front hip measurement using the side seam of my jeans as a guide. It was 19". I did the same across the back and it was 23". I measured the finished length required then added 1.5" for elastic turnover and 1" for the hem.


Next I cut two pieces using these measurements halved for the width, because I was cutting on the fold. I did not add seam allowances as this will give the negative ease required for a stretch skirt. I kept the waist the same width as the hips because the elastic will draw it in. I did taper the sides in a little towards the hem to give a figure hugging skirt. It looked like this:


As you can see, the bespoke nature of this skirt means if you need more at the front for a bigger tum you could do that or in my case I need more fabric round the back! Either way the side seams will be at my sides.This is a super speedy over locker make but you could do it on a regular machine too. Sew the sides, try it on to make any adjustments then serge or zig zag the top and bottom. 


Next measure a piece of 1" wide elastic around your waist comfortably and add 1/2" for a join. Ensure that when stretched it goes over your hips. (so you can get your skirt on and off)
Join the elastic into a hoop using the 1/2 inch you allowed yourself. 

Mark the elastic in quarters with pins. Line up opposing pins with the side seams and pin in place on the wrong side of the fabric. Now line up the remaining opposing pins with the centre points of the skirt front and back. See picture below:


Now zig zag or overlock your elastic in place by stretching the elastic to fit the fabric. Do not stretch the fabric.


To finish fold over the elastic and use a straight stretch stitch to run a line of stitching through the skirt and elastic fold over. You will need to stretch it a little to allow the waistband to stretch over your hips when you put it on and to avoid puckers. 

This is thick ponte roma jersey so I turned the overlocked edge once and top stitched it in place to avoid a bulky seam.


Hooray! New skirt. This is a great way to practise with Jersey knit fabrics without wasting too much fabric.If it all goes wrong, put it in the bin and try again - you will get better in no time at all. Mine however was worn to work on Monday to invigilate exams - super comfy for sitting down for 2 hours.

Jo xxx

PS. I will put a link to this tutorial on my sidebar which I have updated a little with some previous useful blog posts which were lost in the midst of time.